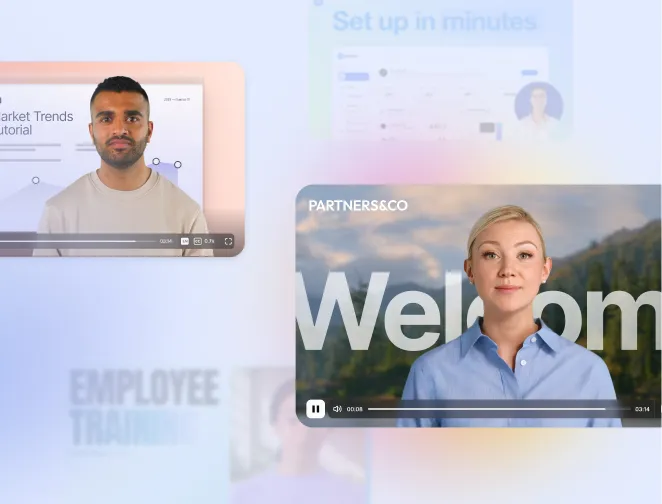


Create AI videos with 230+ avatars in 140+ languages.
Everywhere on the internet, so many articles and blogs rave about all the advantages of video lectures. It's unanimous; online video lectures are the absolute best thing since online education became a thing!
But what about the cumbersome task of creating those lessons? Nobody talks about how you, the lecturer, should have the best cameras, write scripts, and record lectures. You must cringe at the thought of doing so many takes for just one scene!
Well, while the internet advances learning through each video presentation, we're here to help you create these lessons without aggravation. With Synthesia's AI video creation tool, of course.
So, how do you do it? Here's a step-by-step guide on how to make video lectures without any cameras.
Step 1: Prepare your video lecture script
You need to consider certain factors when writing your scripts, such as the understanding level of your students and the elements you plan to throw in (images, PowerPoint presentations, etc.).
Once you've done this, the rest is easy.
If you need a little help, read this blog post on how to write a training or lecture script.
Step 2: Pick a template or build your own
You have your video script now. The next step is signing in to your Synthesia account to begin creating video lectures. On the dashboard, you'll find two options to start your video creation. You can either use a pre-existing template or make a video from scratch.
If you're using a pre-designed template, you can add more scenes from the template by going clicking on + on the right-hand side of the video canvas.
There, you will see all the different video scenes that were designed to fit the template.
Choose as many scenes as needed.
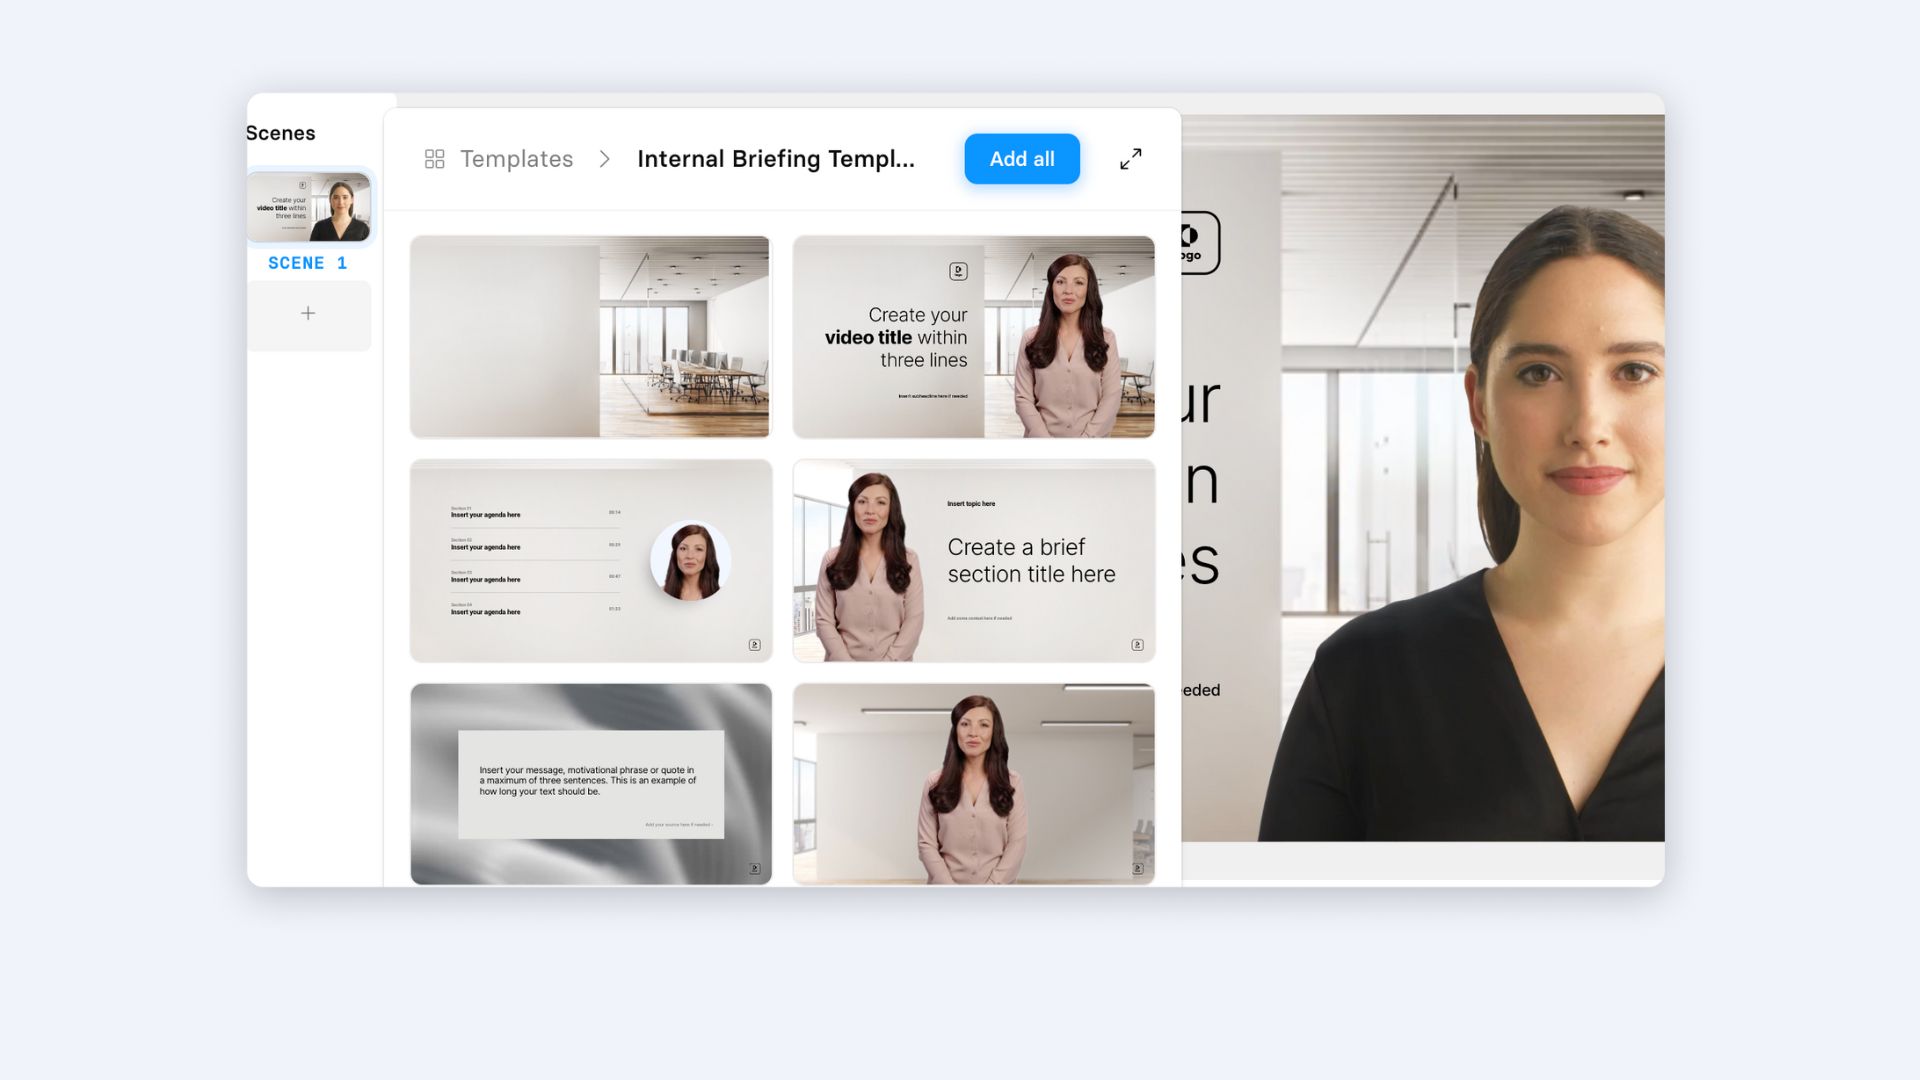
However, if you want to make your own branded video template, we have a detailed guide for that:
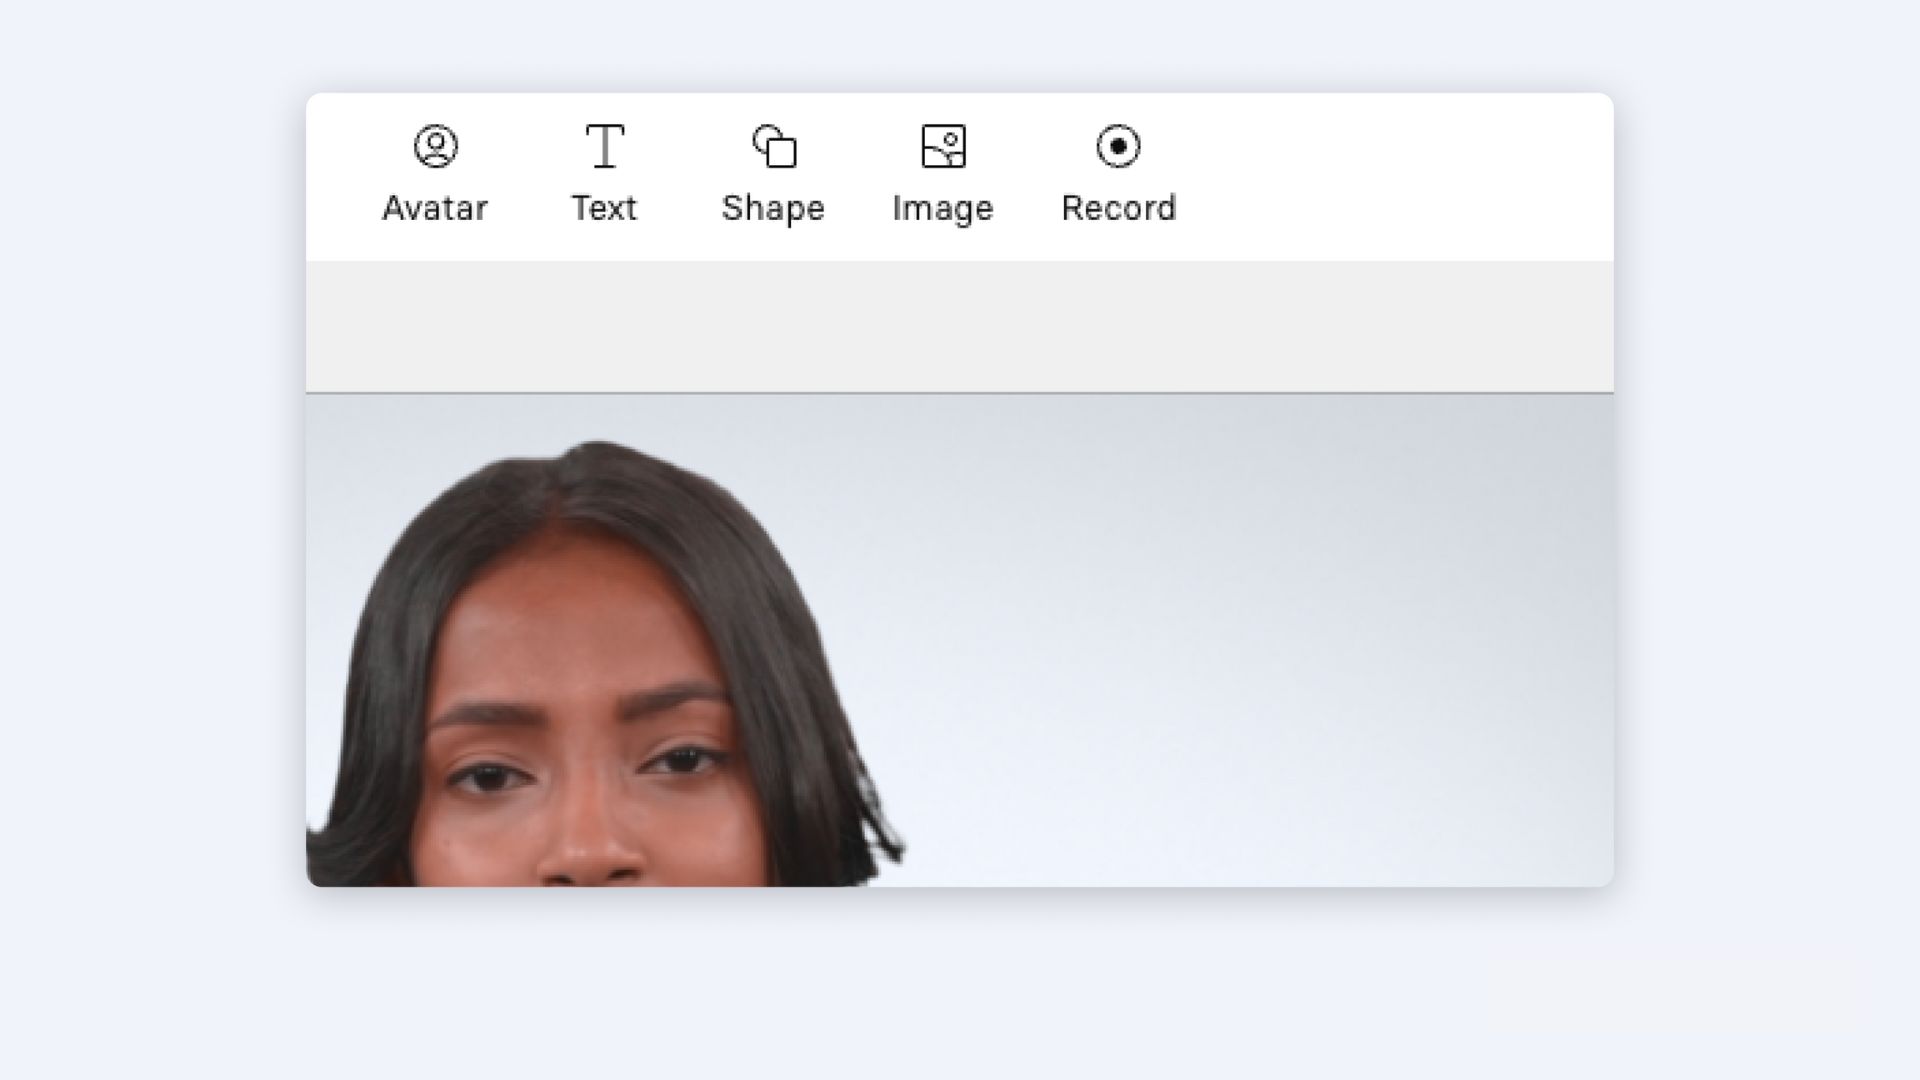
Step 3: Pick an AI avatar for your video
So, let's assume you decided to create your own videos. You need to choose one of the AI avatars to be your presenter. On top of the canvas, you'll see the Avatar icon. When you click, you'll notice the different avatars and framings available. Almost all the avatars come in both framings - chest up and waist up.
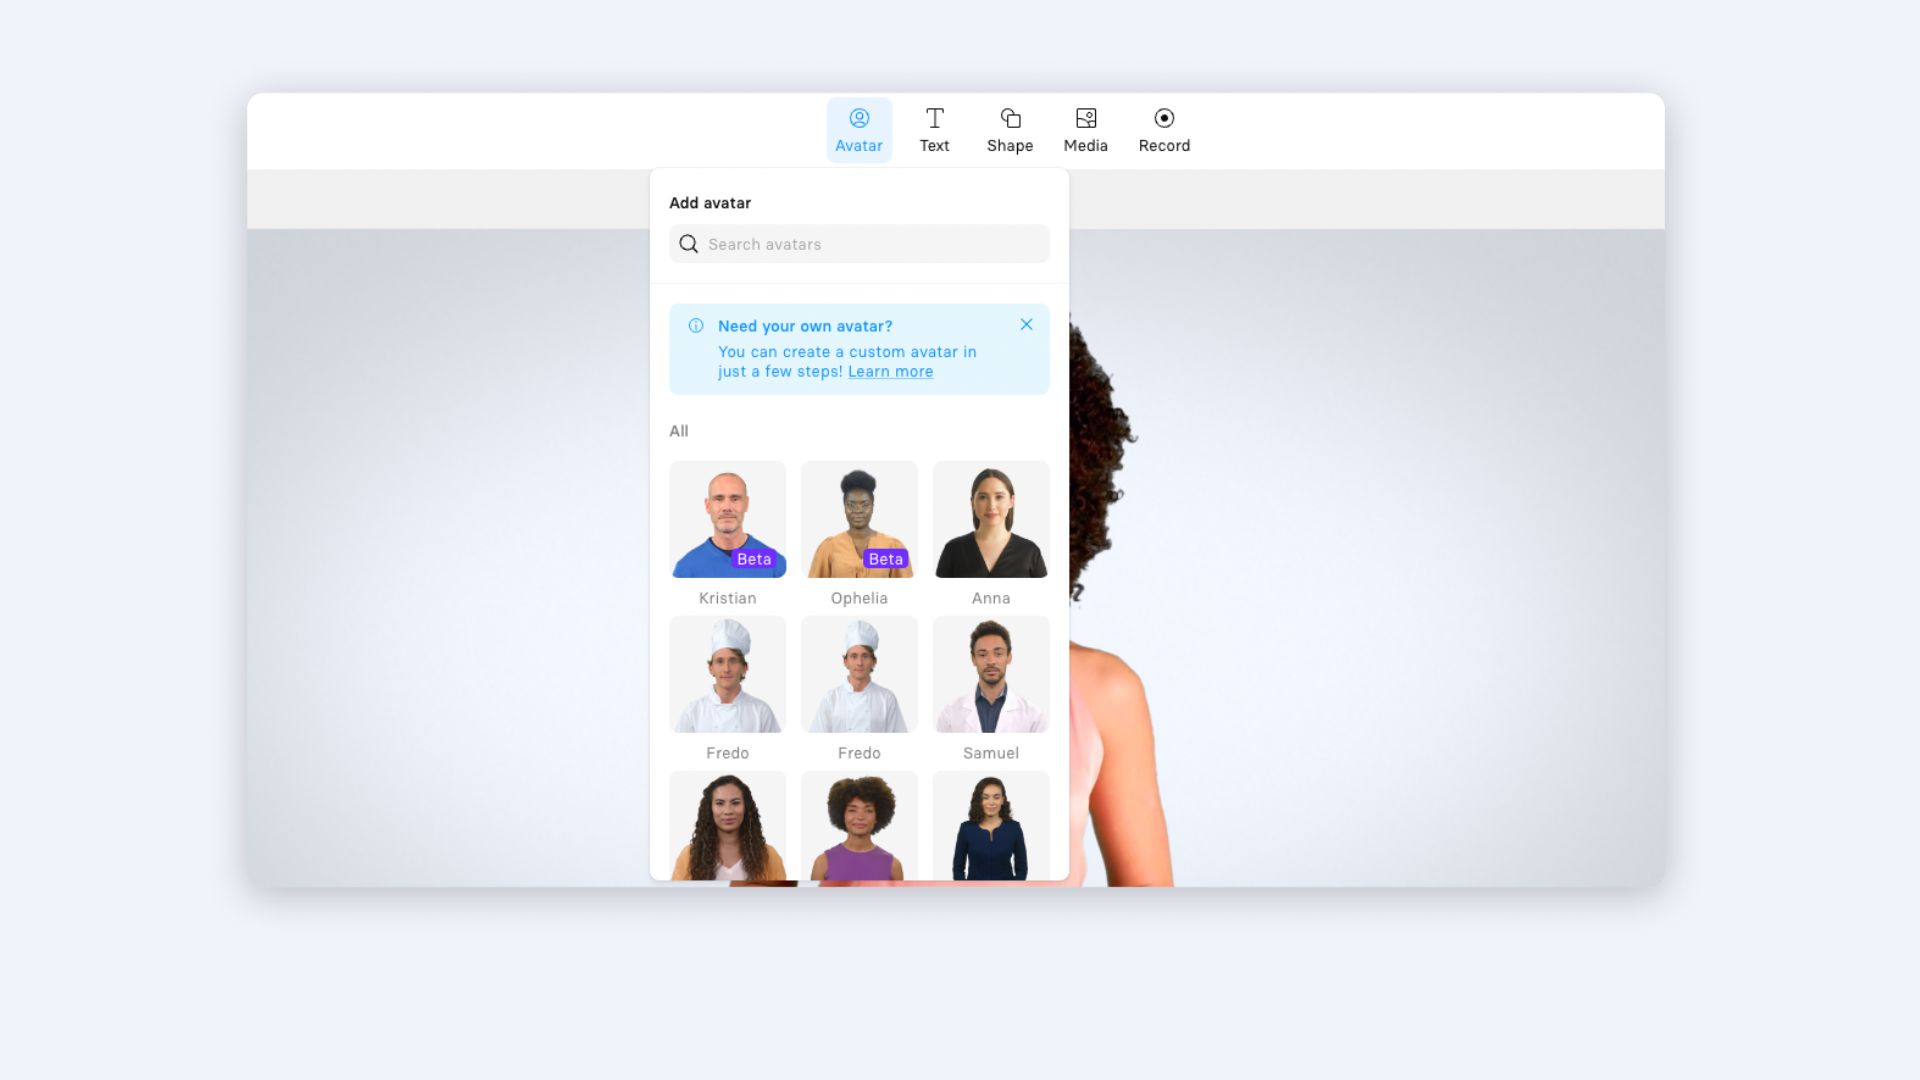
It's up to you to use one framing for all your scenes or mix them up to make your videos more engaging.
Another cool feature is choosing your avatar's appearance in the layout. They can be in full view, in a small circle so that they remain on-screen or off the screen so that only the audio plays while other elements of your video tutorial are displayed.
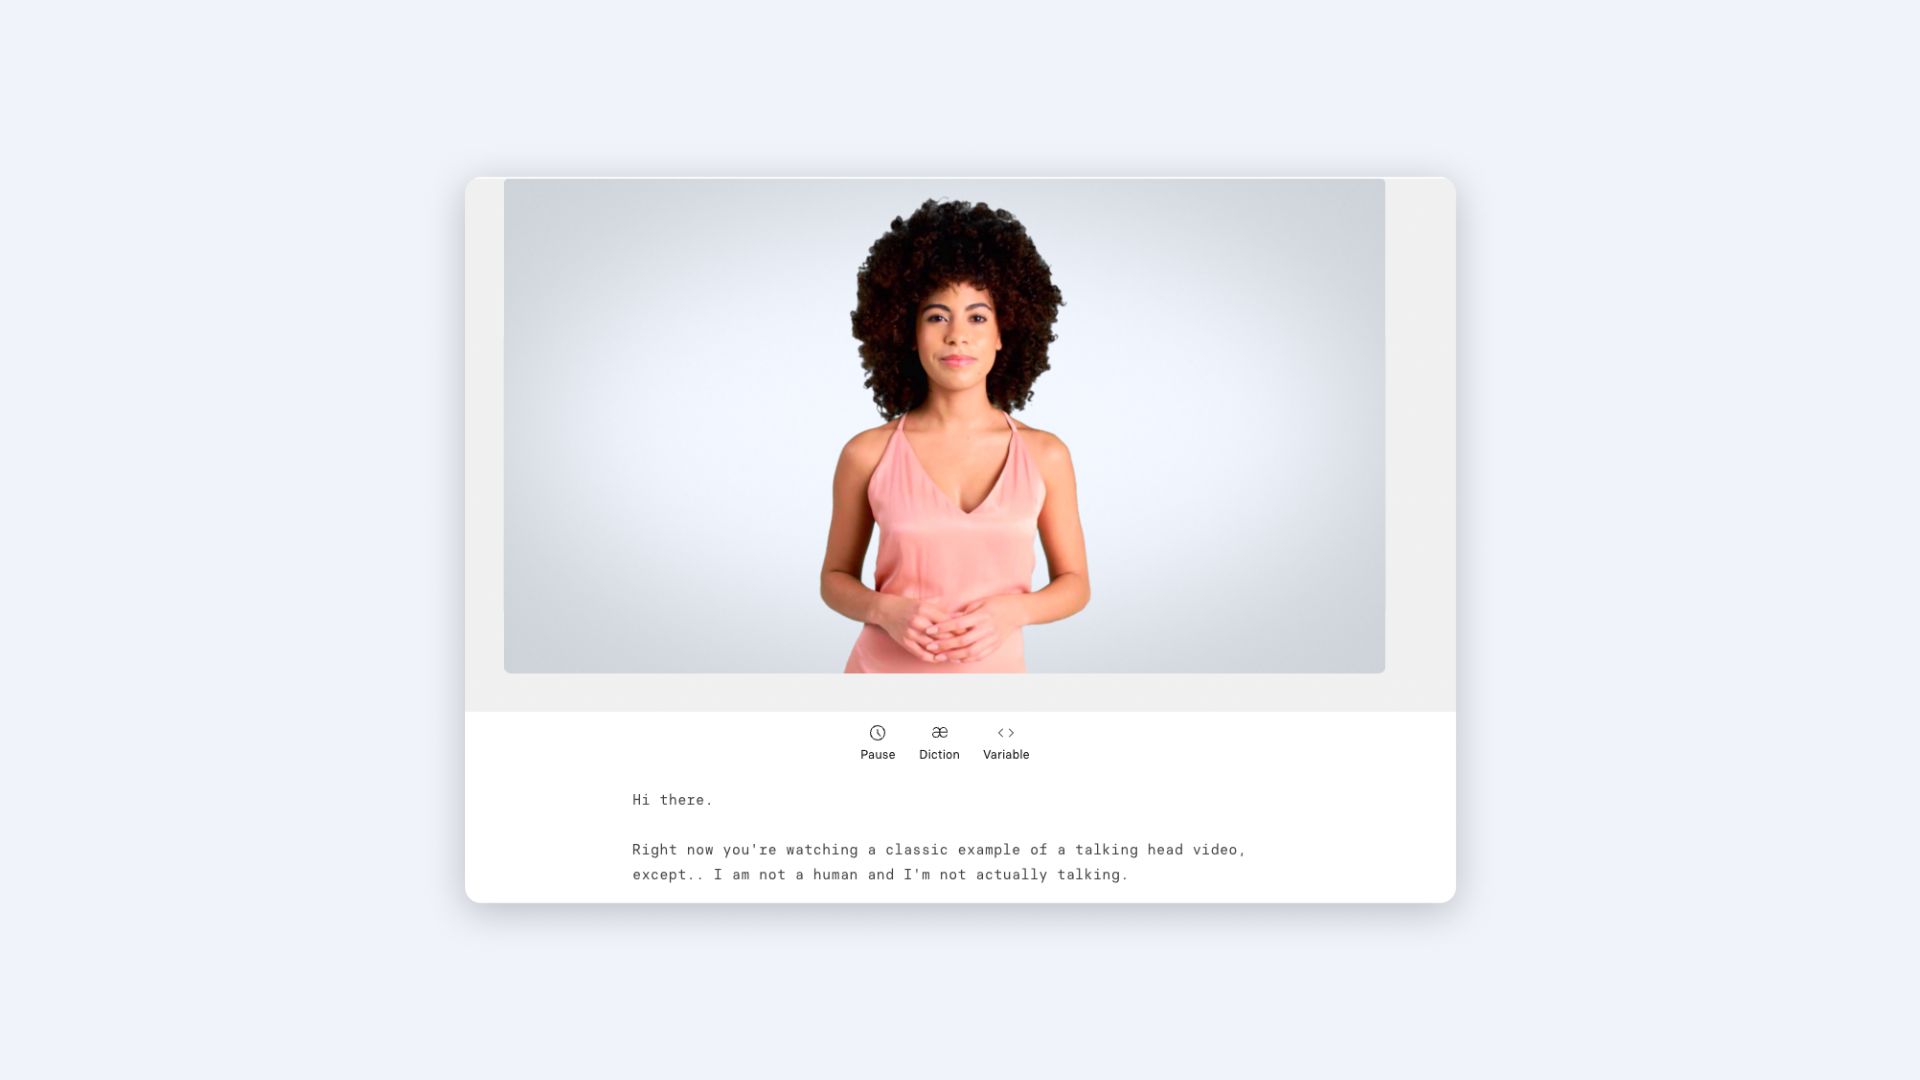
Step 4: Paste your script and create your voice-over
Now, it's time to input your script to create the voice-over.
You must copy and paste the script into the script box for the scenes and slides.
Synthesia automatically assigns a voice based on the language it detects as soon as you paste the script. But you can change the voice to your preference. Just click on the voice selector on the left part of the script box.
Step 5: Edit your video
This is the part where you fine-tune your video. You can add many elements here, such as text, animation, shapes, images, icons, video recordings, and music.
Go to the Media section atop the video canvas to add images, videos, or icons. Under 'My library,' you can add an image you already used in Synthesia or download stock photos. You can also upload photos to the tool and add them to your video.
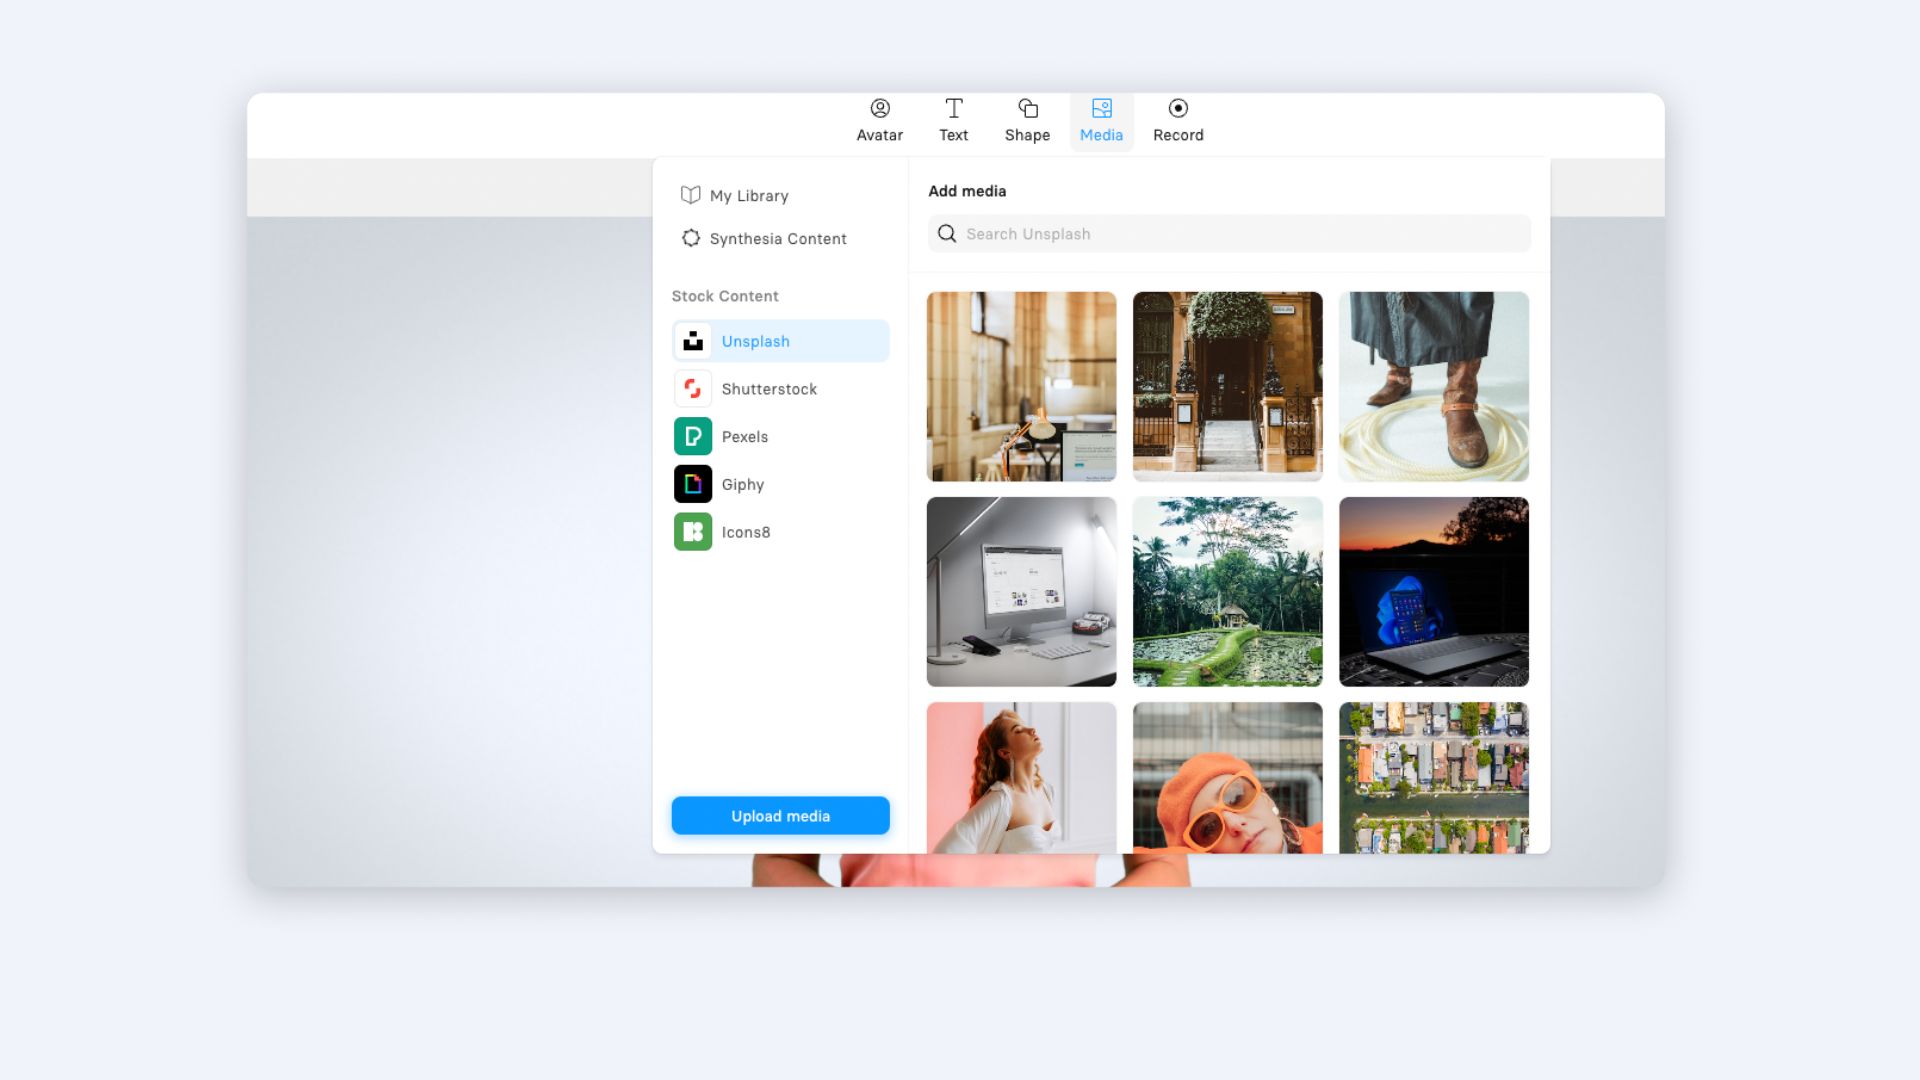
To add a screen recording, just click the Record button atop the video canvas, and start recording. Using our free online screen recorder, you can record a tab, a window, or your entire screen. Thereafter, you can trim, cut, or loop the screen recording in your video in sync with the script.
To see how to add other elements, such as text, images, shapes, icons, transitions, and music, read this blog post on how to make AI videos using Synthesia.
Step 6: Generate and publish your video
Feel free to do a little victory dance here. After all the knick-knacks you've had to put together, your video lecture is finally ready to be published!
Before you generate the video, press the 'Play' button in the top-right corner to preview it.
If it makes you smile and nod in satisfaction, go ahead and click 'Generate.' Depending on the length of the video, you might need to give it a few minutes to generate.
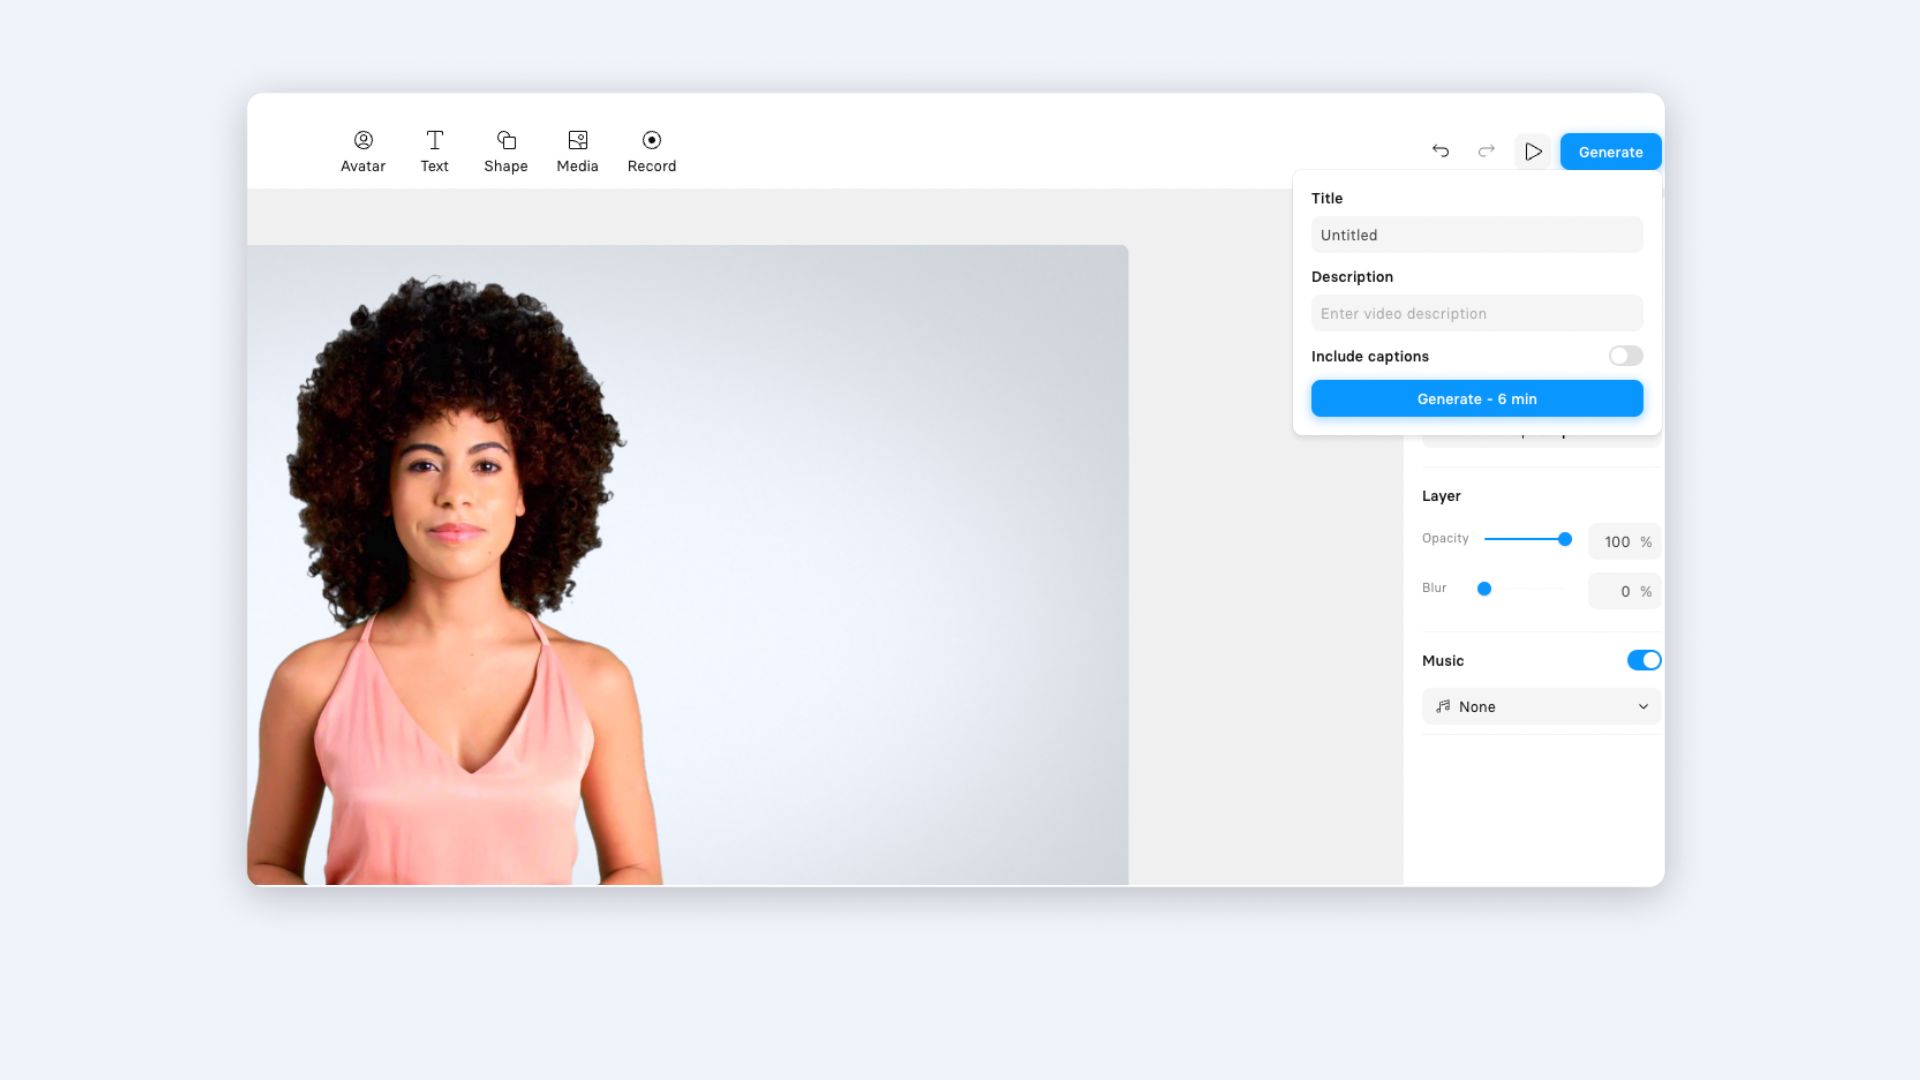
You can download, share, edit, or duplicate it as soon as it is generated.
Why should you use Synthesia for your video lectures?
If you're still wondering whether you should do your lecture capture the traditional way or with Synthesia, here are a few key points to note.
Ease
With Synthesia, you simply need to gather the ingredients like your script, images, video presentations, and screen recordings, and you're ready to create class lectures for anyone to watch online. Bye-bye to endless hours of traditional lecture recordings.
Speed
You can create a complete lesson in minutes! The time you save with Synthesia lets you work at your own pace. If you're using a pre-existing template, you can create many slides in less than 15 minutes!
Quality
Create video lectures and online courses that are on-brand. With good video quality and a consistent design, your lecture capture is excellent to be uploaded on YouTube, Google Classroom, and any website that hosts courses—no need to worry about background noise.
Now that you know how to make video lectures, you can use this knowledge to create courses or video tutorials for your YouTube channel.
Not only is learning simplified for your students, but the creation process is easier for you. It's a win for everyone!
Integrate your presentations, screen recordings, images, etc., into your videos. You can upload them to YouTube for your students and anyone interested in your courses.
Create your video lectures now with ease using Synthesia
Now that you have seen how easy Synthesia can make your video lecture recording, try the AI video generator. Use any of the templates or make yours from scratch. Check out how to create video lectures from these example videos.
About the author

Strategic Advisor
Kevin Alster
Kevin Alster heads up the learning team at Synthesia. He is focused on building Synthesia Academy and helping people figure out how to use generative AI videos in enterprise. His journey in the tech industry is driven by a decade-long experience in the education sector and various roles where he uses emerging technology to augment communication and creativity through video. He has been developing enterprise and branded learning solutions in organizations such as General Assembly, The School of The New York Times, and Sotheby's Institute of Art.


Frequently asked questions