

How to Make a Video Lecture

Create engaging video lectures that work beyond the classroom.
What adjectives come to mind when you hear the word lecture?
Monotonous? Lengthy? Formal?
If any of those resonate, you're not alone. Lectures have a reputation for being all of those things. There are exceptions, of course.
And we shouldn't be surprised. The word lecture derives from the Latin lectura, meaning "to read aloud." In medieval universities, instructors would literally read texts aloud to students (thrilling, I know). Over centuries, the term expanded to include any instruction on a subject before an audience.
What makes a lecture successful is the communication contract between the instructor and their audience.
Medieval university students expected to be read at during lectures. Modern students expect instructors to read the room, slowing down when people look confused, pausing for questions, adjusting in real time. There's a built-in feedback loop.
That feedback loop disappears in video. You can't slow down because someone looks confused. You can't pause because the energy has dropped. Everything that would have been reactive in a live lecture has to be designed in advance.
That's what this guide is about. Not production quality or being good on camera, but understanding the medium and how to teach effectively through it.
Step 1. Figure out who's in your room
Before you design anything, you need to figure out who's in your room (metaphorically speaking) for the lecture, what they need to be able to understand or do at the end of the lecture, and any constraints, such as pre-requisites for understanding the lecture.
That means answering three questions:
- Who is my audience?
- Where will they watch this video?
- What other materials will they have access to?
Your answers to these questions will guide your decisions on five design elements of your video lecture.
Step 2: Define your learning objective
Start by asking yourself:
After this lecture, what should learners be able to understand or do?
This objective should move beyond "this is a lecture about retirement accounts" towards "by the end of this lecture, someone should be able to choose the retirement plan that works best for them based on three criteria."
The rule of thumb is one objective per lecture. If you have more than one objective, you're creating multiple videos.
If the video lecture is part of a larger course, I make sure the objective connects clearly to what comes before and after it. If it is a standalone lecture, the objective becomes the organizing principle that keeps the lecture focused.
Step 3: Segment your content
Take it from someone who has spent years teaching in classrooms, it is so tempting to cover the same amount of content that you would in a live lecture in a video.
That's where most video lectures fail. Think about it, when you're delivering lectures live, do you talk non-stop for an hour or longer? Absolutely not.
You likely exchange pleasantries with students and share important updates at the beginning. Perhaps you have a dedicated 5-minute break in the middle for people to stand up or get some water. All of these moments add up to intentional pauses, which you should similarly plan for in your video.
That begins with segmenting your content. A simple framework that may work for you is this:
- Context. Why are learners spending their time watching this video?
- Explain. Introduce the core concept, method, or argument.
- Check understanding. Use an example or knowledge check
Step 4. Pace yourself
Perhaps the hardest decision you'll need to make is how to pace your video lecture. That's because we often let the amount of content dictate the length of the video (much like Parkinson's law, where we take the amount of time we've allotted for a task to do it).
While there's no "right" length for a video lecture, here's what research has shown. In one study, engagement dropped for videos that are more than 6 minutes in length (to 50% for 9-12 minute videos, and 20% for 12-40 minute videos). In another study, the use of interactivity extended engagement beyond 6 minutes, showing that learners will watch longer videos when they're actively engaged.
What should you take away from this? Keep your videos to a reasonable length, knowing that a series of 5-minute video lectures will likely overperform one 50-minute video lecture.
There are exceptions, particularly for complex material like you have in higher education settings. What matters more than anything, is how you pace yourself through the content. That means signaling what's coming, speaking authentically, and explicitly transitioning from one topic to another.
Remember, a learner can always pause and rewatch or adjust the volume, playback speed, and captions (more on that later) to suit their preferences.
Step 5: Choose your materials and tools
Lectures and slide decks go hand-in-hand, right? Yes, in live lectures. But like every other design decision so far, video fundamentally changes the types of materials you can use.
In a classroom setting, I can put a poll on the projector and ask students to log into a third-party site to participate. With certain video tools, I can embed this directly into the video lecture, no third-party platform needed.
As I alluded to, the decisions you'll make around materials are dependent on the tooling you select for your video lecture.
And yet, this is a bit of a catch-22. The types of materials you can use depends on the tools you use to build your video lecture. Here are a few examples to illustrate that.
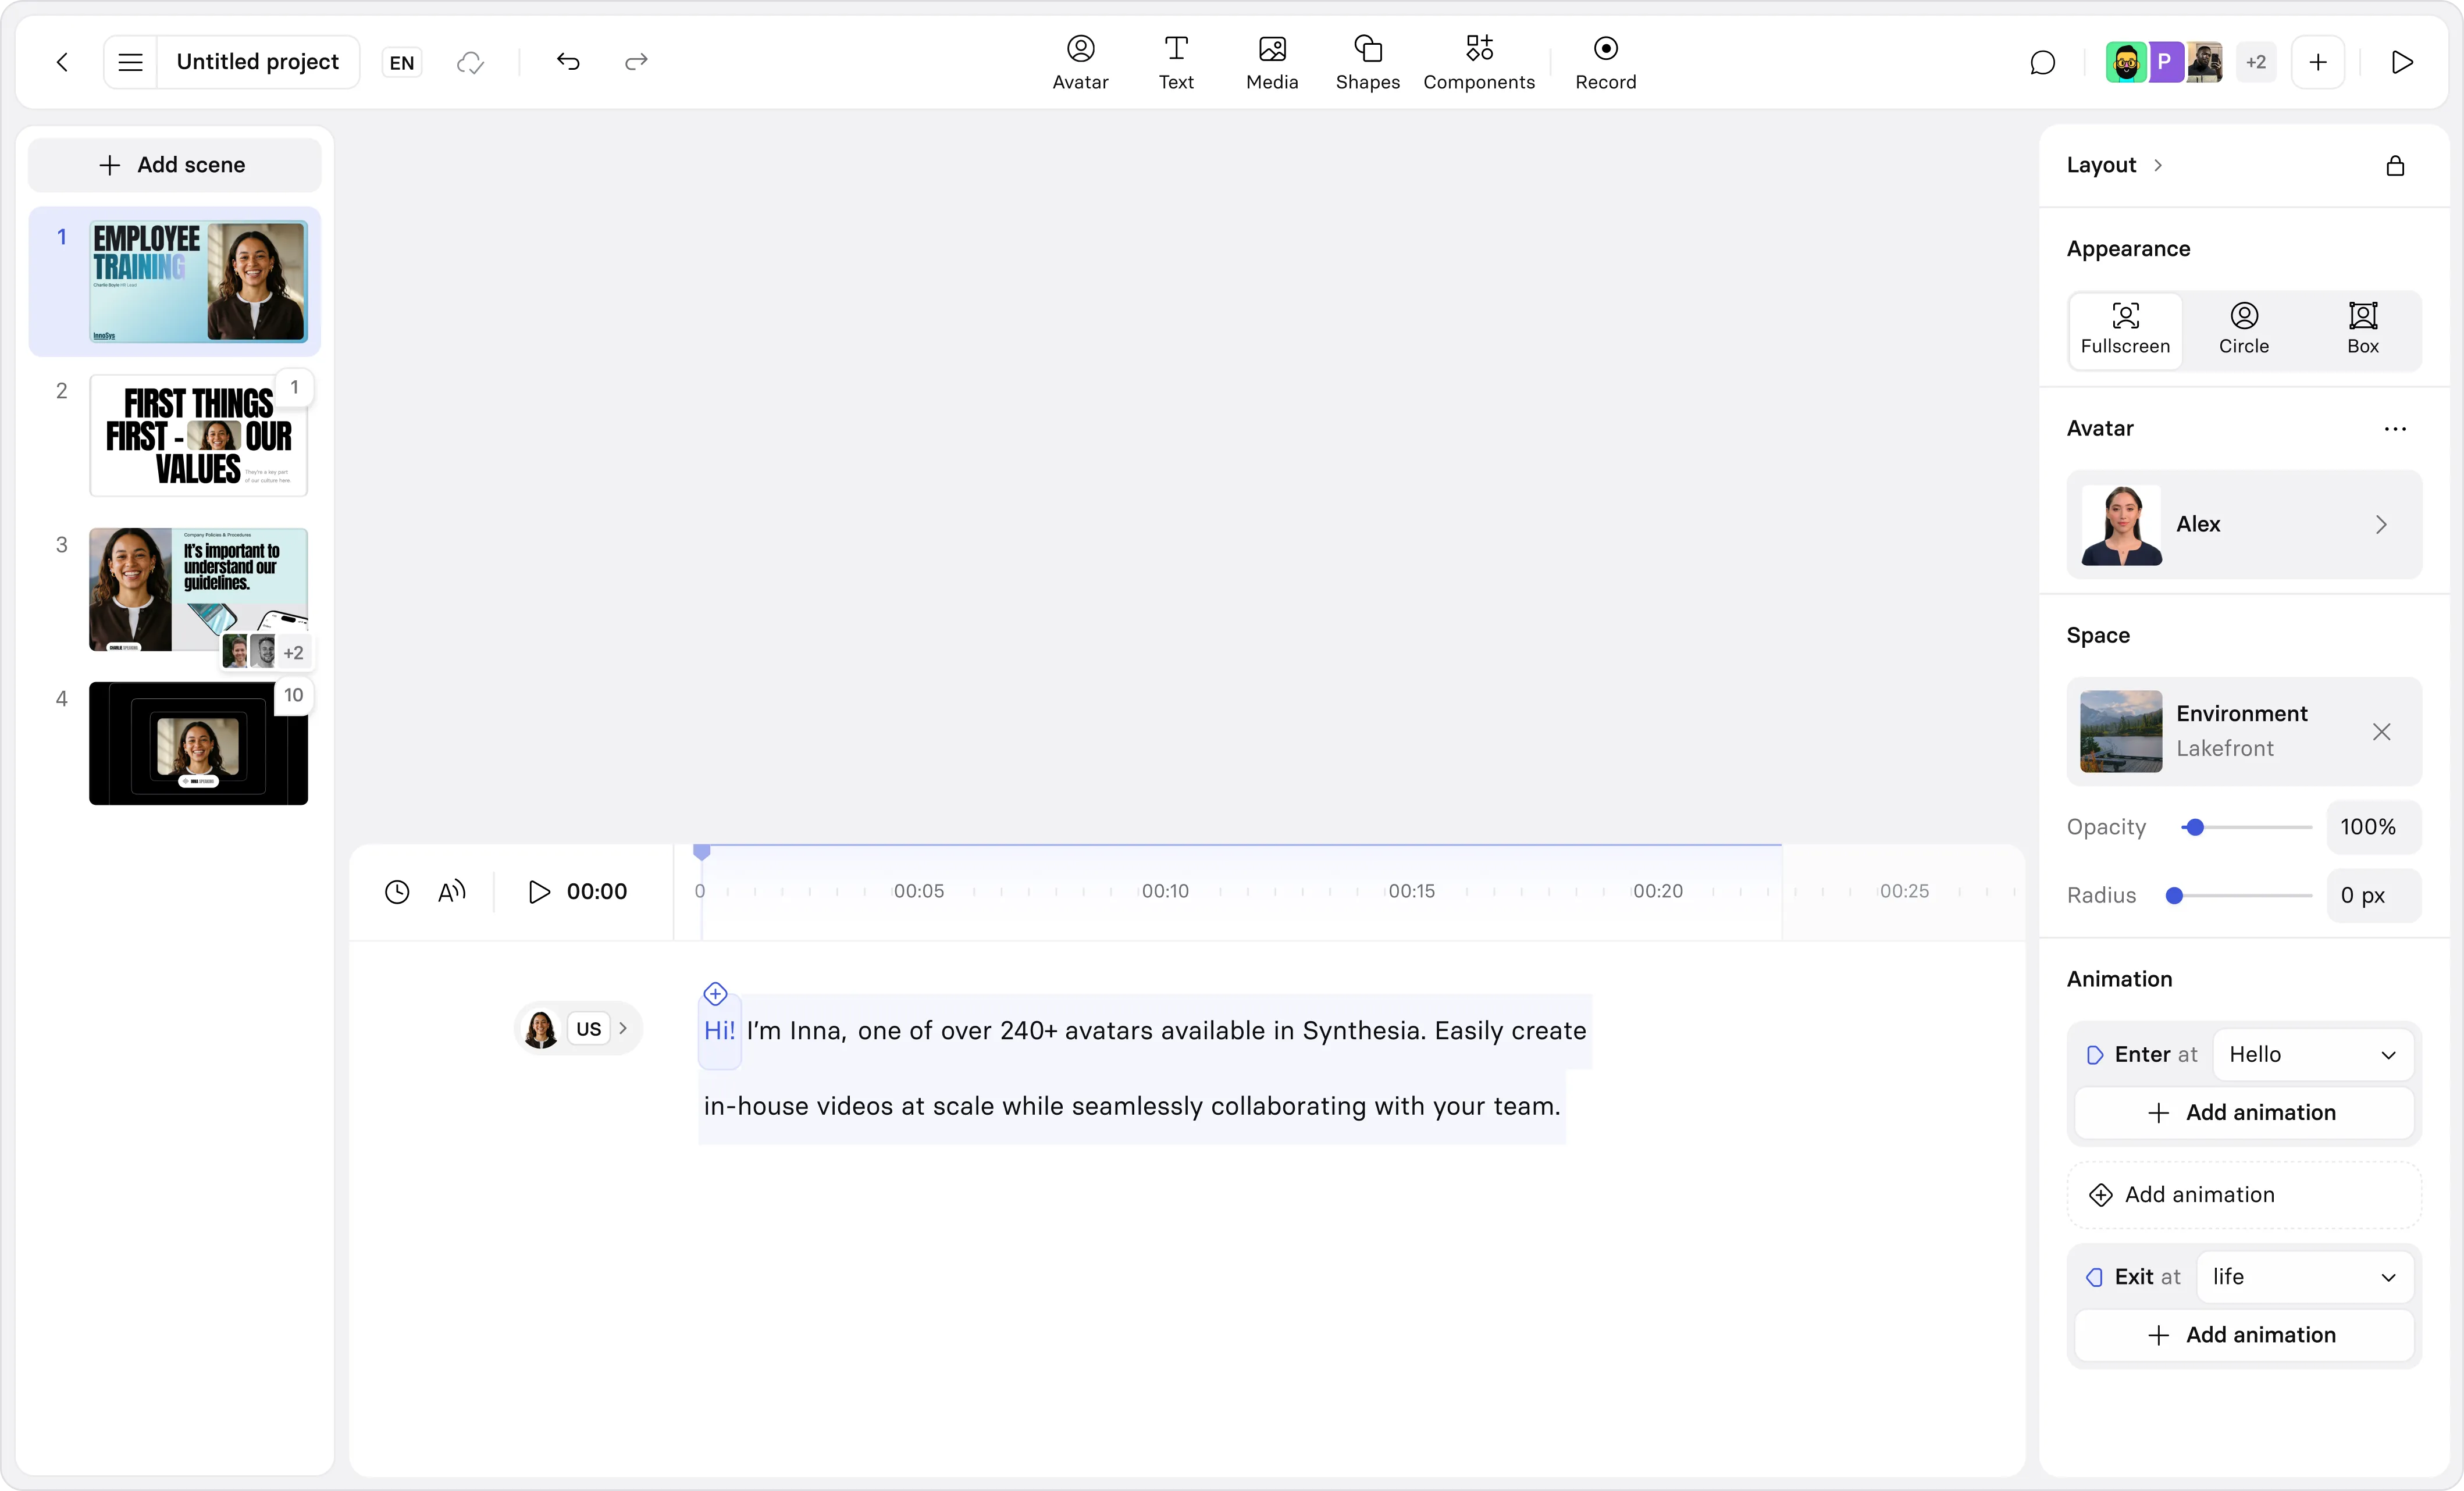
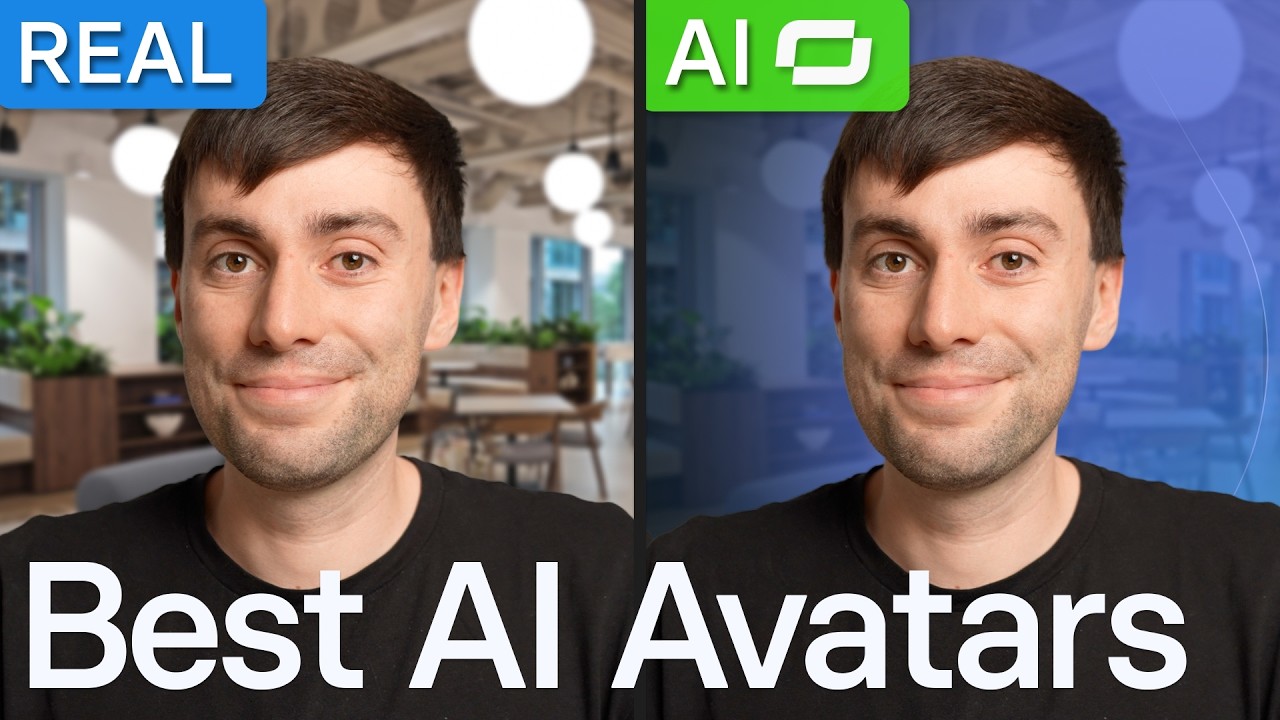
Should you use an avatar?
Depending on the platform you choose, you may have the ability to use an AI avatar in lieu of recording yourself. Whether or not to use an avatar in a video lecture is a personal decision. You may consider your lectures to be an extension of your personal brand and prefer complete control over your lecture delivery. That's understandable.
Sometimes, I find instructors choose to create a custom avatar when they need better audio quality. If you don't have the right recording equipment or you have to record in a noisy location, an AI avatar tool may be the solution. It can provide you with an authentic talk track that you can direct (including word-level pronunciation control).
If you're interested in seeing how this works, watch this brief overview.
No matter what, you don't always need to be onscreen during a video lecture. You can alternate between having your face visible and using narration only.
I highly recommend narration only when covering complex topics, there is research supporting this approach. Nonetheless, there is value for your person, whether real or AI avatar, being visible at some point during the video lecture.
Does production quality matter?
I'm often asked if the quality of production matters for video lectures. The answer to that is, yes, and no. Here's what I mean. There is no research that conclusively supports higher production value as a driver of learning outcomes.
What does matter is the consistency of your production. That comes down to a few things:
- Audio clarity. Invest in a proper microphone (your AirPods aren't cutting it), and reduce any noise in your recording environment. Professionals often throw a coat over their head in a pinch or record from a closet. If possible, I always recommend subtitling your videos or at least making sure your platform auto-generates captions.
- Scene alignment. Make sure the narration matches the on-screen content. Importantly, you don't need to narrate everything that's on-screen, and you don't need everything that's narrated on-screen.
- Continuity. Viewers will notice substantive changes to things like lighting, location, or even your wardrobe. Reduce these distractions whenever possible.
The goal with your video production is good enough. Your time is better spent on instructional design than production polish.
If you're using an AI video platform, sound quality and captioning are handled automatically.
Next steps
Your video lectures will get better with practice. Instead of trying to create a perfectly crafted lecture out of the gate, try lowering the stakes.
Use our free video generator tool to play around with how a video lecture plan or previous recording transcript can be transformed into an effective video. Practice recording yourself and test out different pacing. Review it too. Getting used to watching yourself lecture takes practice.
Check out our step-by-step guide to building your video in Synthesia.
Amy Vidor, PhD is a Learning & Development Evangelist at Synthesia, where she researches learning trends and helps organizations apply AI at scale. With 15 years of experience, she has advised companies, governments, and universities on skills.
Frequently asked questions
How long should a video lecture be?
There is no "right" length for a video lecture. Research suggests that engagement begins to drop for videos that are longer than 6 minutes.
While you will absolutely need more than 6 minutes to explain a complex topic, consider segmenting your lecture into smaller chunks. A series of 5-minute chapters will likely outperform a single 50-minute video. It will also make it easier for students to revisit content.
How can I make video lectures without filming myself?
The first option is to do a screen recording with narration. You can use any software, like Camtasia, PowerPoint, or Synthesia, to record yourself speaking over slides or scenes.
The second option is to use an AI avatar. You can create your "digital twin" with our platform by uploading high-quality footage of yourself and, importantly, consenting to creating your personal avatar. This allows you to revise any narration without re-recording anything.
What is the best tool for creating video lectures?
I can't make a recommendation without knowing more about the scope of your project. That's why we've put together these guides to AI video generators and eLearning authoring tools so you can make an informed decision for yourself.
How do I create video lectures in multiple languages?
You have several choices. The first is to work with a vendor specializing in localization for your target languages. The second is to use a localization platform.
The third option is to use an AI video platform, like Synthesia, so you can create and localize your videos in one place. With Synthesia you can choose between dubbing and subtitling your lectures (there is an important difference in how it affects the learner's experience).
How do I keep my video lectures up to date?
Segmenting is one of the easiest ways to keep your content up to date. You'll find it is much easier to update a 5-minute video than re-record a 50-minute video. If you're using an AI video platform, you can go into the original video, make edits, and publish a new version within minutes.

.webp)
.webp)