

How to Write an Onboarding Video Script (With AI)

Create engaging training videos in 160+ languages.
If you’re responsible for employee onboarding, whether an entire program or just a component, you know that it’s a never-ending project.
Often, that’s due to factors beyond your control, like an ebb and flow of hiring volume, a new office location, or a change in a work from home policy. Or maybe you’ve had a change in team structure or resourcing.
Regardless of your motivation, you’re here because you’re considering using videos in your onboarding program (or you’ve found them to be successful already and want to scale them).
So let's talk about how to write onboarding video scripts that are easy to update when you inevitably need to.
Types of onboarding videos
Before you can write a script, you need to know what kind of onboarding video you're making. These are the five most common types of onboarding videos I see teams creating:
- Welcome videos congratulate new hires on their role and introduce them to the company
- Company culture videos showcase what it's like to work there
- Role-specific onboarding videos train on core responsibilities and common workflows
- Health and safety videos cover workplace procedures and common risks
- Compliance training videos fulfill regulatory requirements
Each type has a different intent, and with that, a different tone and structure. Welcome videos should feel warm and personal. New hires want confidence they've made the right decision joining the company. Company culture videos can offer the same assurance with more creative leeway. If your company culture is genuinely distinctive, a video is a good way to show it.
Role-specific, health and safety, and compliance training videos tend to be more formal in tone and grounded in best practices.
Onboarding training video scripts
If you're planning a training video, I highly recommend your script writing process starts by completing this sentence:
This video is for [specific role] who currently [context or gap]. After watching, [specific role] should be able to [observable action] so that [business outcome].
This will be your north star throughout the script-writing process, no matter how you choose to get started. I've given three ways to take that learning objective and build a compelling script.
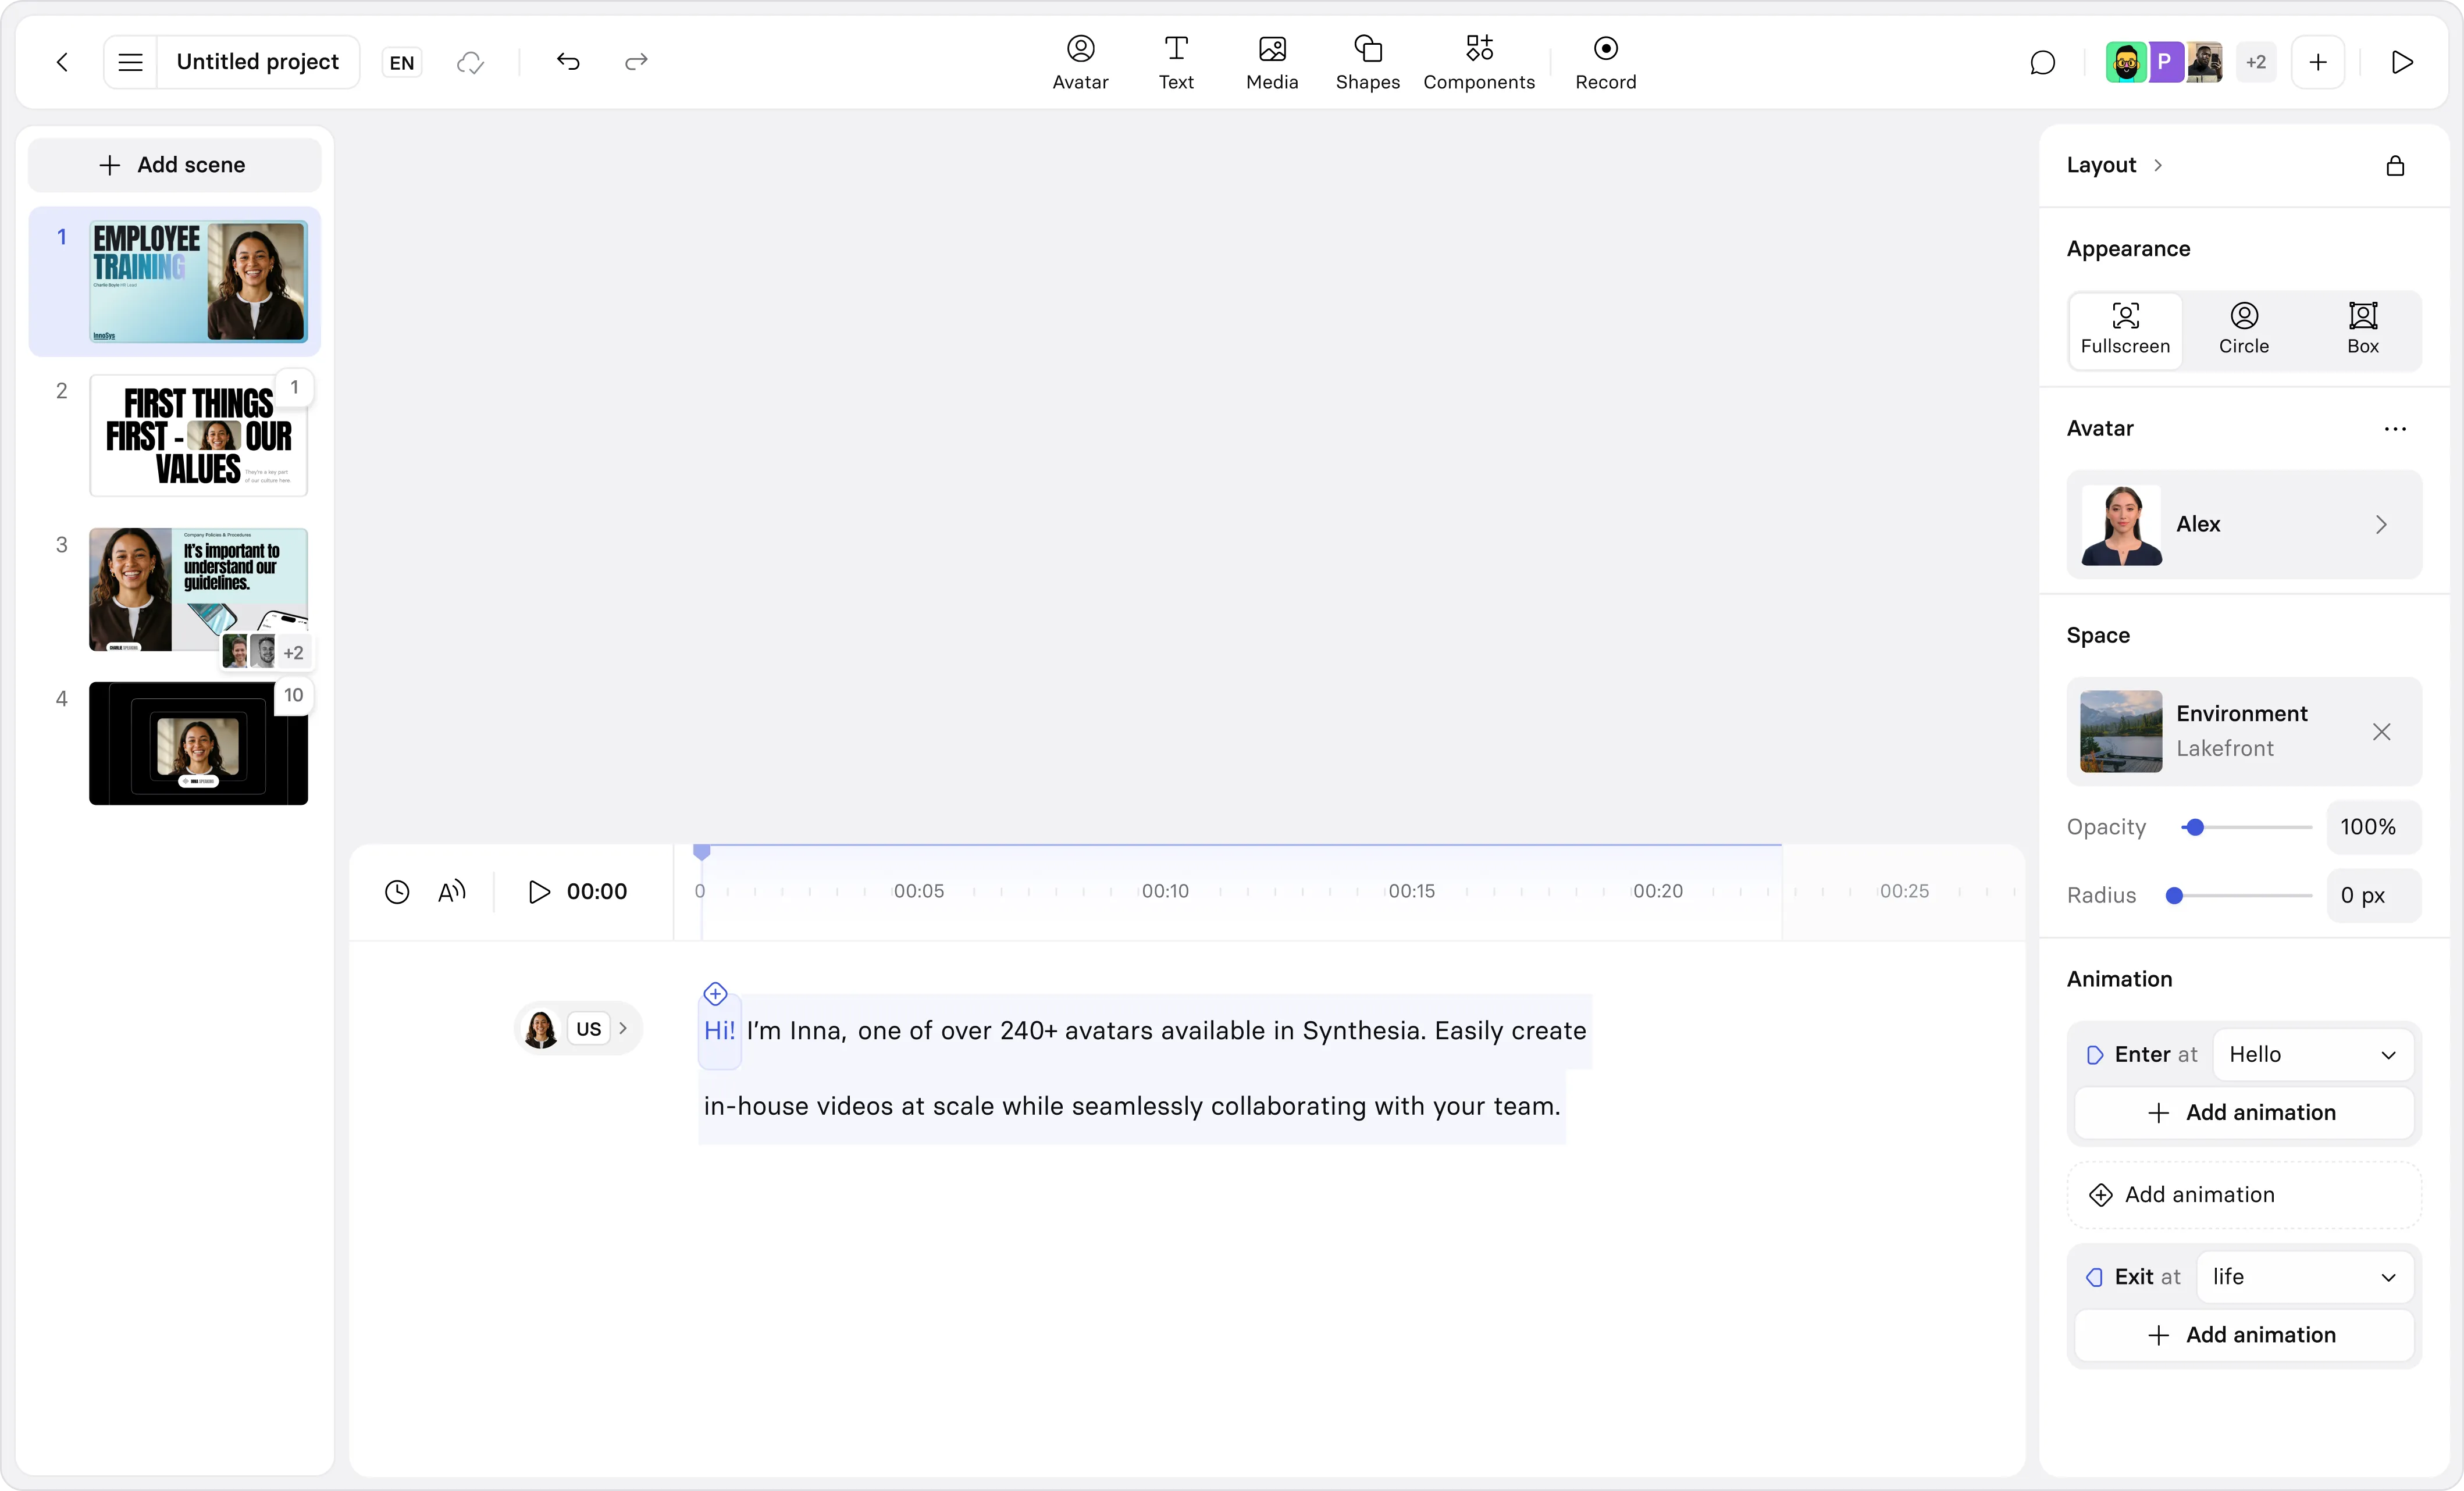
Option 1: AI Script Generator
If you're staring at a blank page and struggling to get started, I recommend trying out a free AI script generator.
Open the link, copy and paste the sentence you wrote down above, select a tone of voice and output language, and hit generate. Voilà, a first draft that you can react to.
Sometimes we just need to see an example of a script to know whether it's working or not. Even if you don't like it, dig in. What isn't working? What could be better? Use that feedback to try regenerating again (click the button at the bottom right).
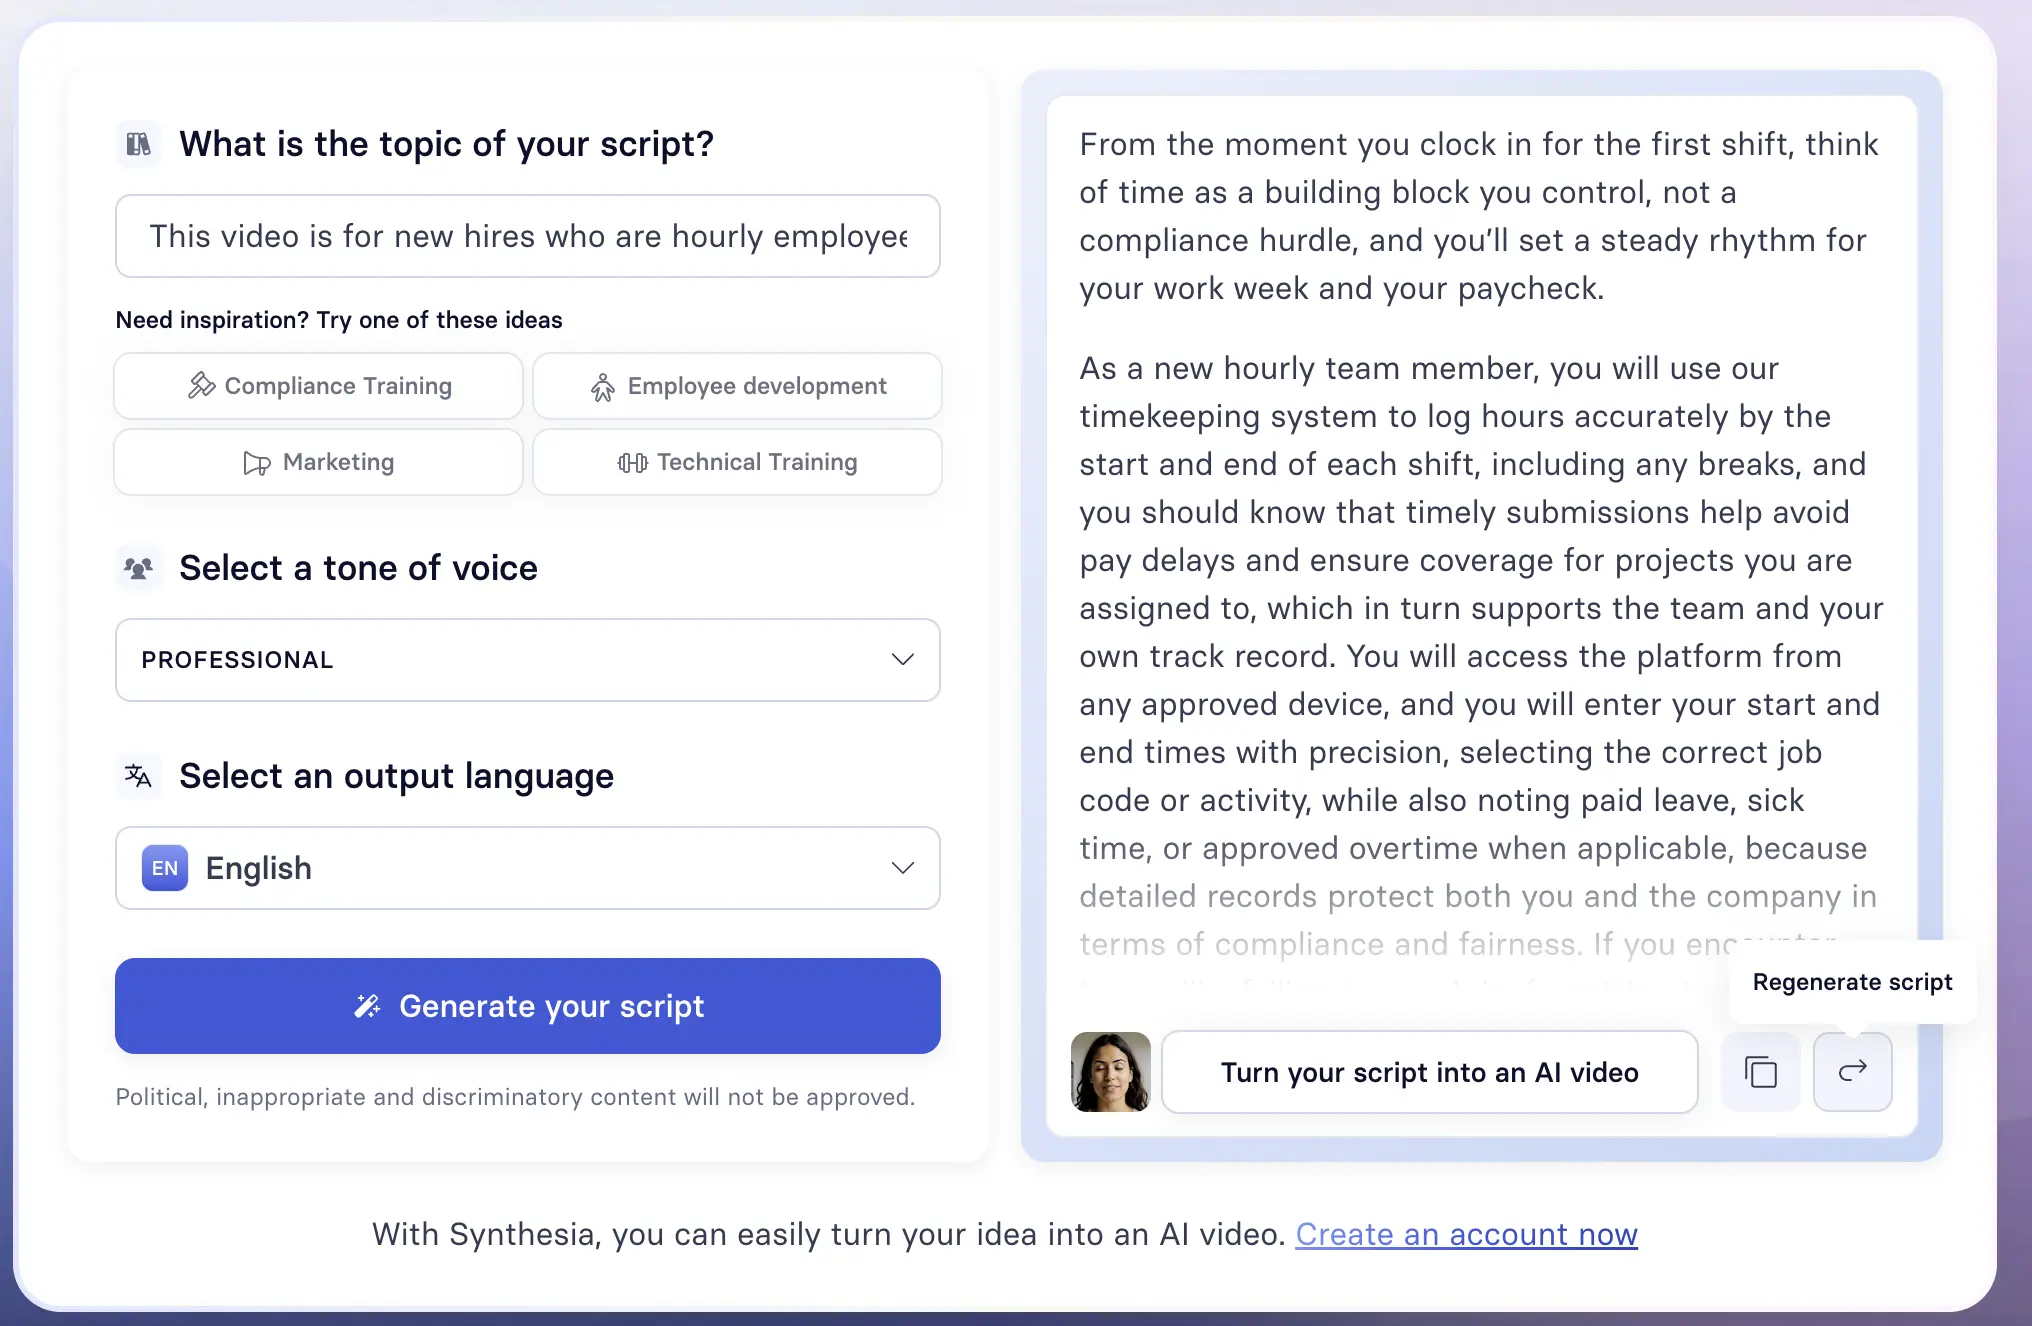
If you're wondering, here's what I used in the example above to get this output.
This video is for new hires who are hourly employees and need to track and submit their time for payroll. After watching, they should be able to log and submit their hours correctly by the weekly deadline so that payroll is processed without corrections and their first paycheck arrives on time.
Option 2: LLM
If you prefer a more hands-on approach to script writing, you can use an LLM to write a first draft. Go to whichever LLM is approved by your company (since you're likely going to be using sensitive information), and prompt the AI to generate a first draft.
I recommend using a structured prompt. CIDI is a helpful framework:
- Context — Give the LLM a role and enough information to understand the scope of the task.
- Instructions — Provide step-by-step instructions of how you want the task to be performed.
- Details — Include any constraints that will guide the style or quality of the script.
- Input — Attach any relevant materials the LLM should reference.
Here's an example of a prompt that you can customize with your learning objective.
Be sure to treat the output as a first draft. Ask the LLM to evaluate how well it did, and have it regenerate based on whatever feedback it — and you — identify.
Option 3: Template
The last way I recommend drafting a training video script is using a template. A template is a structured starting point for your writing process that you can modify as needed. There are two templates you can try to get started: one that is more universal (and lends itself well to compliance or safety training), and another that is tailored for onboarding tasks like how-tos.
Both templates use the following components:
- Hook — Why someone is spending their precious time on this training
- Outcome — What will someone be able to do immediately after?
- Step-by-step instructions — The minimum number of steps to complete the task or make the decision
- Pitfalls — Common mistakes and how to avoid them
- Next action — What someone does next, and how they get help if needed
While not every training video needs all of these components, they provide scaffolding for what to include in your script.
Welcome and culture video scripts
If you're planning to write a script for a welcome or company culture video, I recommend doing some research.
While it can be helpful to watch examples for inspiration, I'd only watch a few to understand what works and what doesn't in the format.
A welcome video and a company culture video should be unique to your organization. A tech company might have an informal and direct culture; a financial services company may not. That's okay. There's no prescribed way to script these videos.
I encourage you to search for inspiration internally. Look at the company's history, mission, and values. What's the story behind them? Talk to employees and perhaps even customers, noting what stands out. And don't forget to reflect on your own experience of the company. Why are you working there? How can you translate that to a new hire?
Once you have enough ideas and a direction, you can use an AI script generator or LLM to help you draft the script.
Best practices for onboarding video scripts
Effective video scripts, whether they're designed for information transfer or training, distribute the cognitive load for viewers. That means carefully choosing what you narrate and what you show on screen. You don't need to narrate everything you show, and you don't need to show everything you narrate.
A good rule of thumb is one topic per scene. If a scene is trying to do too much, split it.
No matter how you draft your script, treat the output as a first draft. Read it aloud, or have Google Docs read it to you. It's the only way to catch awkward sentence structure or word choice that feels off. If you used an AI tool, ask it to evaluate how well it did and have it regenerate based on whatever feedback you both identify.
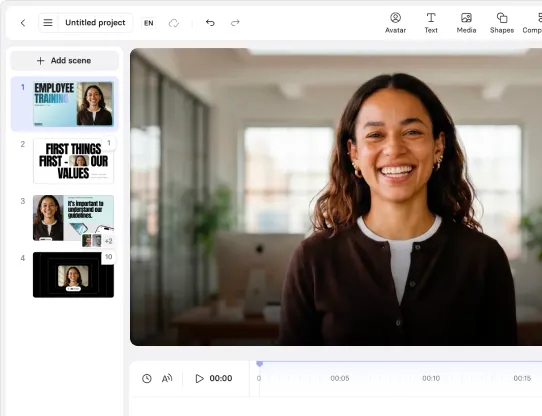
If you're curious how the script could translate into a video, you can always try using our free AI video generator tool.
Here's an example of an onboarding video that follows the script writing best practices I've shared.
Amy Vidor, PhD is a Learning & Development Evangelist at Synthesia, where she researches learning trends and helps organizations apply AI at scale. With 15 years of experience, she has advised companies, governments, and universities on skills.

You might also like
.webp)