When recording each scene, focus on guiding the learner’s attention and pacing your actions so they can follow along while completing the task themselves. Instead of trying to capture everything that happens on your screen, treat the recording as a way to direct focus to what matters most.
Record slightly slower than you would normally perform the task. A simple rhythm helps learners stay oriented and follow along in real time:
Name the action
Perform the action
Pause briefly
Short pauses before and after key actions give learners time to find the same element on their screen, complete the step themselves, and check that they are on the right track.
Use visual cues to guide attention
Visual cues help learners know where to look without guessing, especially in dense or unfamiliar interfaces. To keep the recording easy to follow, use subtle cues that naturally draw attention to the next action without breaking the learner’s flow.
For example:
Slow the cursor near important elements to gently signal where the learner should focus
Briefly hover before clicking to confirm the target before taking action
Use light highlights or outlines, when available, to make key fields or buttons stand out
Add short on-screen labels for critical steps when the interface itself does not clearly communicate what to do next
Keep narration purposeful
Use narration to explain:
Why the step matters
What to double-check
What usually causes errors
Don’t narrate what is already obvious on screen.
Leave brief moments of silence so learners can look, act, and confirm.
Practical tips while recording
A few simple habits can make your screen recordings easier to edit and easier to improve later.
Record in tight segments of 1 to 2 minutes so individual steps can be easily replaced or rearranged.
If you make a mistake, keep going and continue the recording, since you can fix wording and clarity later by editing the script instead of re-recording the screen.
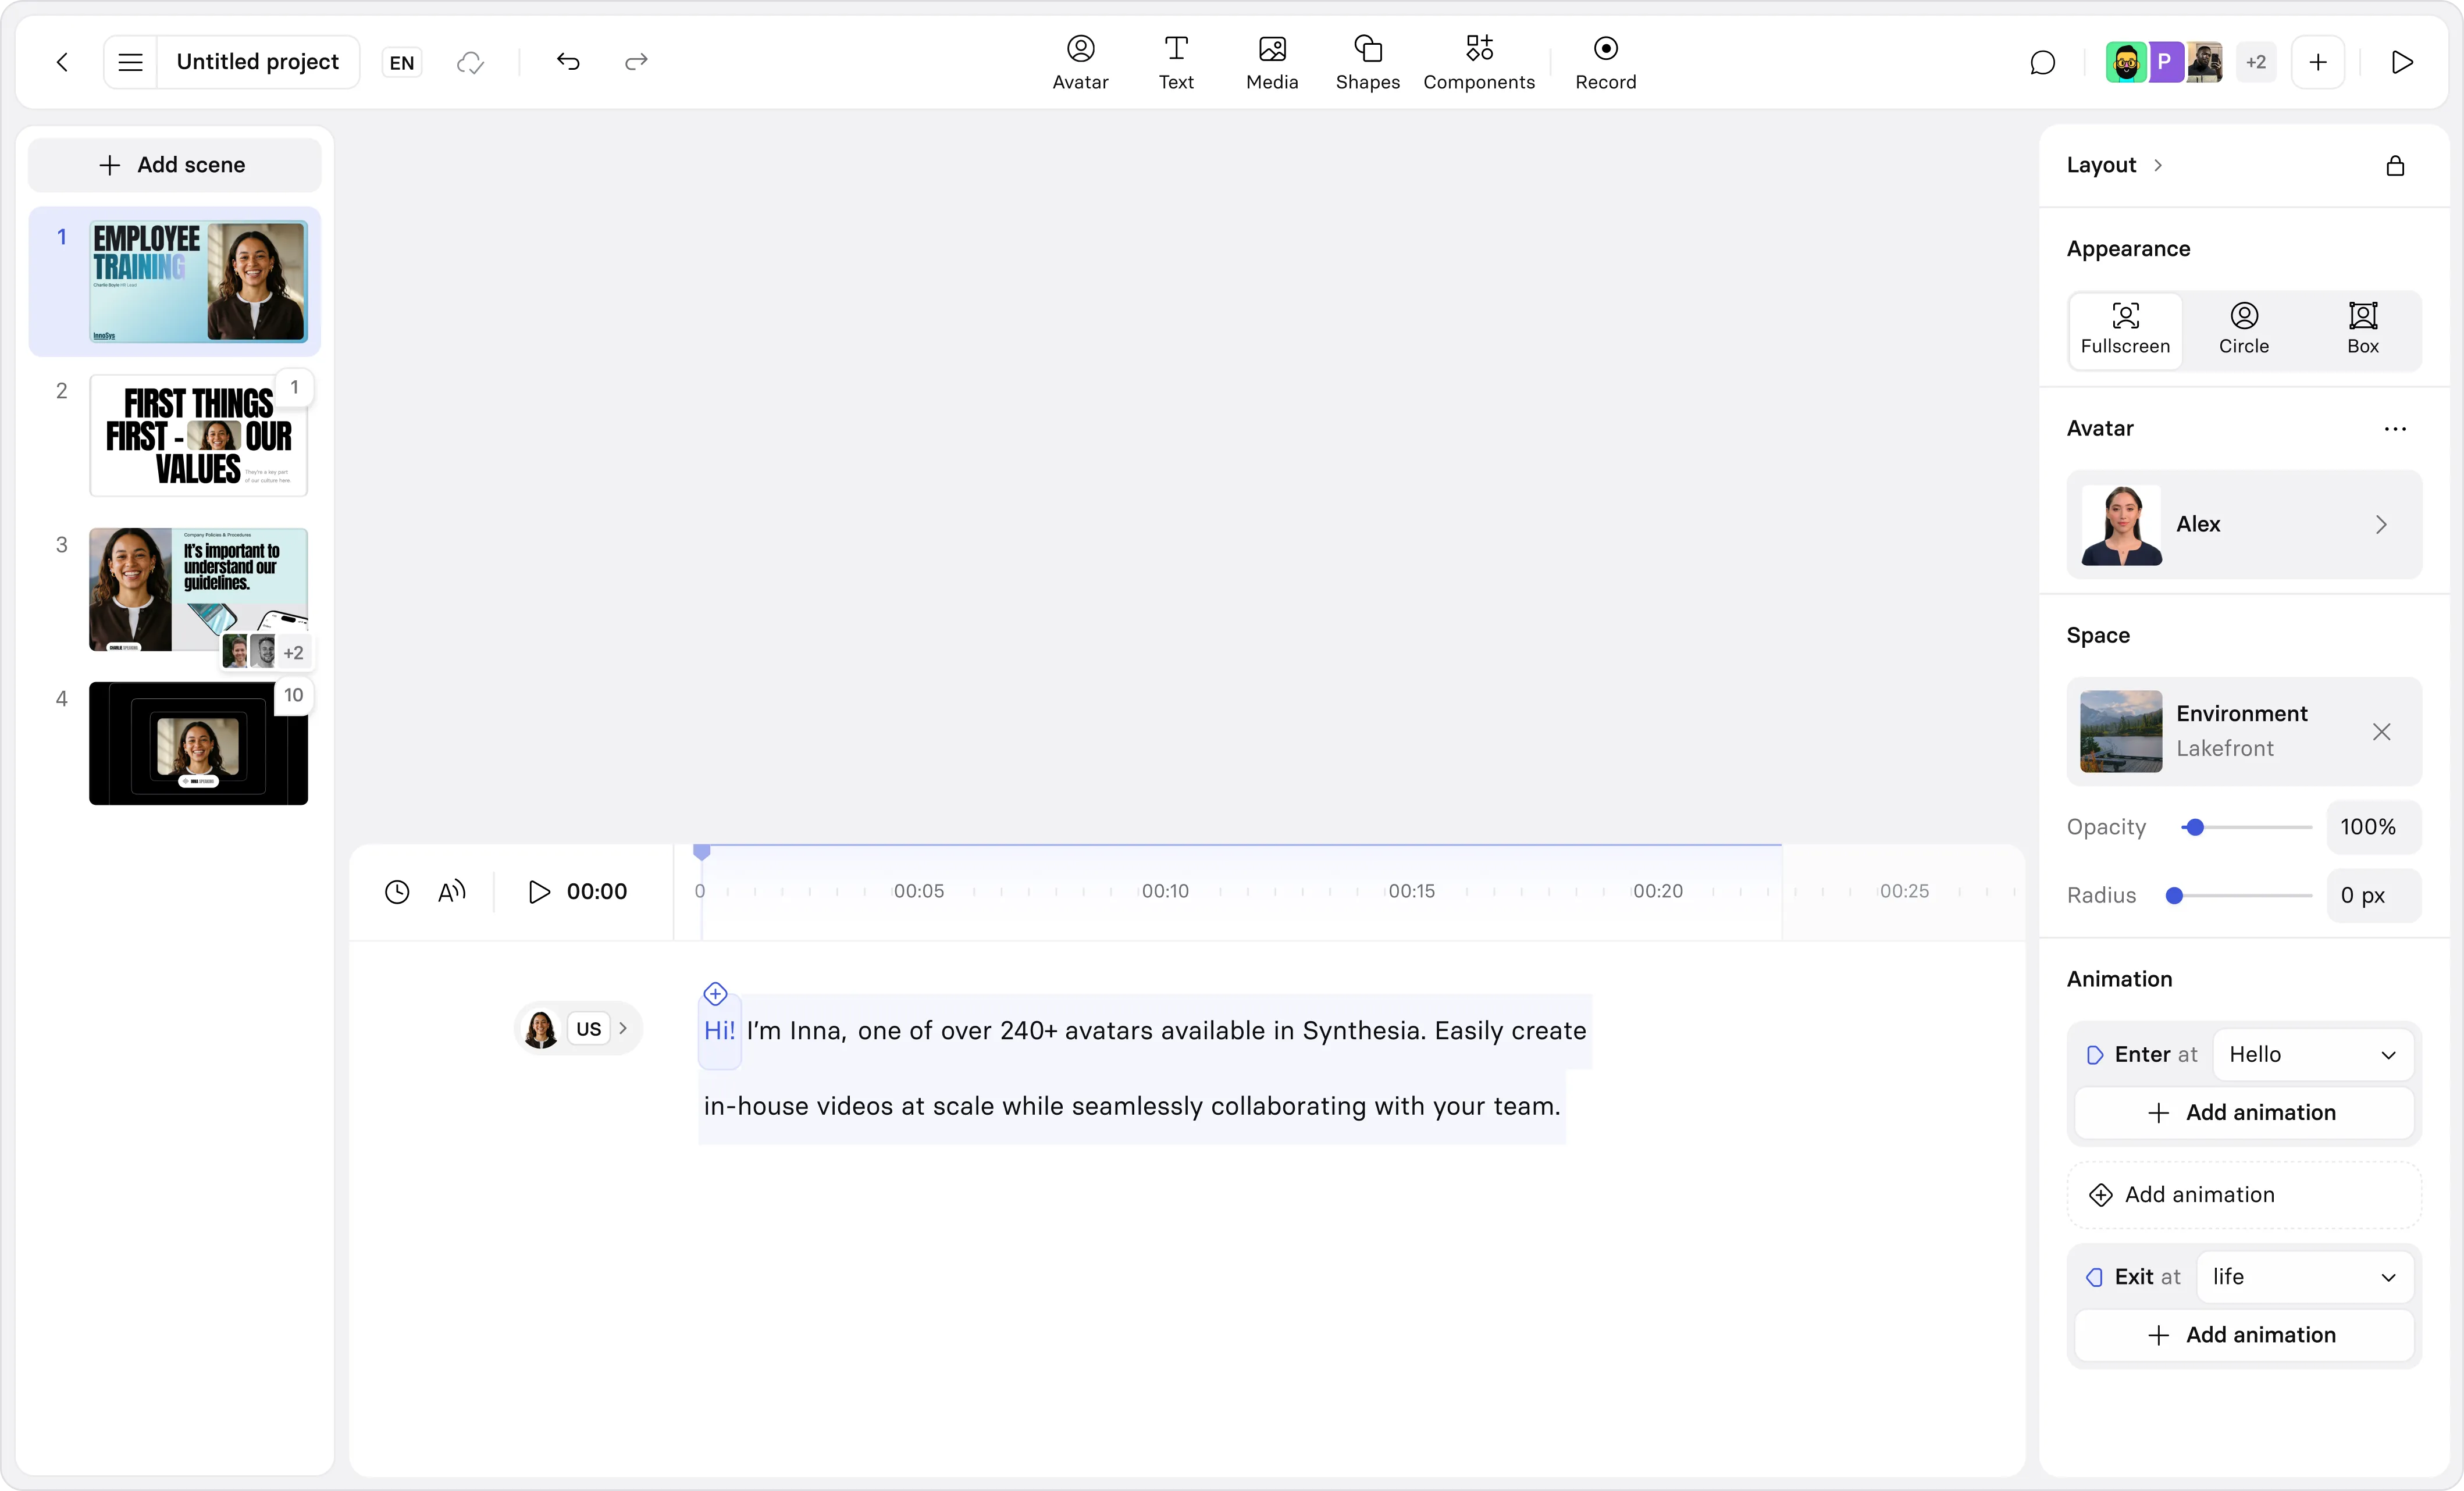
Step 4: Edit and structure the recording
Edit your video
Refine your raw screen capture into clear, consistent, step-by-step scenes so learners can follow the task without distraction. Start by shaping the recording into clean steps:
Split the recording into logical steps (one step per scene), and keep each scene self-contained.
Add short avatar-led transition scenes when you want the viewer to re-focus between chapters.
Next, improve clarity by adjusting the text instead of re-recording the screen:
Remove filler words
Tighten phrasing
Clarify steps
Then make the viewing experience feel stable from scene to scene by keeping the screen capture in the same position:
Reuse a placeholder layout, or
Copy the same X, Y, width, and height values across scenes
Finally, add subtle focus cues or overlays only when they genuinely help guide attention.
Step 5: Generate and share
Generate your instructional video
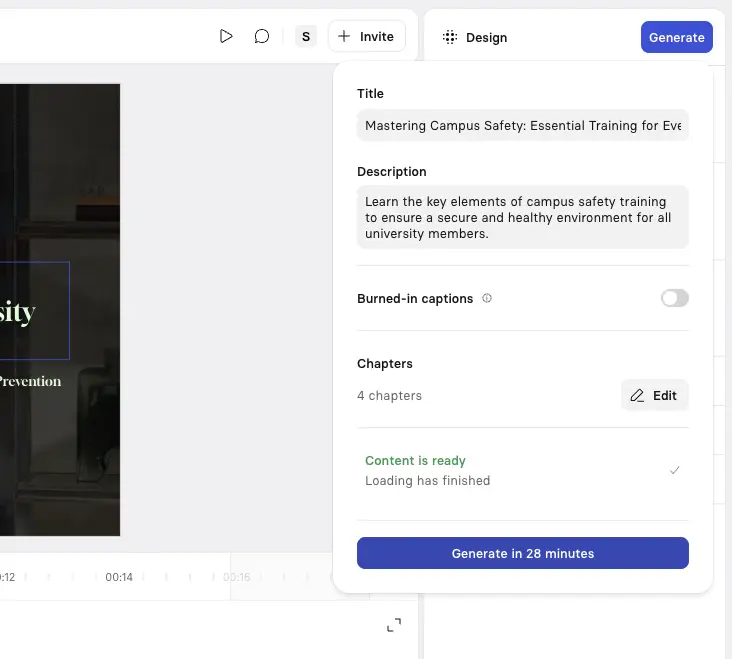
Click Generate to render the final video.
Always include captions. They help learners scan steps, confirm details, and follow along in real time.
Step 6: Publish, reuse, and measure impact
Publish the video where learners already go for help (LMS, help center, knowledge base, shared workspace).
Publish your instructional video
I recommend using clear, consistent publishing and measurement practices so your videos are easy to find, reuse, and improve over time.
Try to give your videos clear, task-based titles and short, outcome-focused descriptions.
To support reuse across teams and contexts:
Treat each video as a standalone task
Avoid time-based references
Keep context minimal and task-specific
Evaluating impact
Try to measure what actually matters:
Task completion or error rates after viewing
Time saved compared to previous workflows
Fewer repeat questions or support tickets
If a video keeps generating the same questions, it usually means one scene needs clearer narration, a step should be split, or a small visual cue is missing where learners tend to get stuck.
Common use cases for instructional screen recordings
Some tasks are especially well suited to instructional screen recordings because they are procedural, repeatable, and sensitive to errors.
Two of the most common examples in organizations are Standard Operating Procedures (SOPs) and tool-based task training.
The templates below highlight training scenarios where instructional screen recordings work well.
Once you’ve identified the right use case, you can adapt the template by adding a short screen recording using Synthesia’s screen recording tool.
Use case 1: Standard Operating Procedures (SOPs)
Standard Operating Procedures define how key processes should be performed so work is consistent, compliant, and repeatable.
When those processes involve digital tools or multi-step workflows, screen recordings make expectations visible.
Video SOPs help teams:
Follow the same process across roles and locations
Reduce errors caused by interpretation or outdated documentation
Preserve operational knowledge as teams and systems change
How to use this template
Use this template to document one complete procedure from start to finish:
Define the exact process the video should cover (for example, “Complete a residential visit record”).
Break the process into clear stages and record each stage as a short scene.
Use narration to explain what to do and what to check, especially where mistakes are common.
Keep the focus on the procedure so the video can be reused across teams.
Use case 2: Tool-based task training
Tool-based task training shows people how to complete a specific action inside a digital system they use every day. These videos are typically short and highly focused, and learners return to them often.
This use case is common for:
Internal tools and dashboards
Reporting and data entry workflows
CRM and operational systems
Product or system updates that require quick adoption
How to use this template
Use this template to support one clear task:
Define the single action the learner should complete (for example, “Create and export a monthly report”).
Record only the steps required for that task, in the order they should be completed.
Use short scenes so learners can pause and follow along while working.
Publish the video where people already look for help, such as a knowledge base or internal wiki.
Applied consistently, this approach turns individual screen recordings into a maintainable training system teams can rely on.
Kevin Alster
Kevin Alster is a Strategic Advisor at Synthesia, helping enterprises apply generative AI to learning, communication, and performance. With over a decade in education and media, he’s built programs for General Assembly, NYT School, and Sotheby’s.
What’s the difference between a screen recording and an instructional video?
A screen recording captures what happens on your screen. An instructional video is designed to help someone perform a task correctly. The difference is intent and structure. Instructional videos define a clear learner objective, focus on one task at a time, use narration and visual cues to guide attention, and prompt learners to apply what they’ve seen. Screen recordings become instructional when they are designed for learning.
How long should an instructional screen-recording video be?
For most workplace tasks, aim for 2–4 minutes per scene and one clear objective per video. Short, focused clips reduce cognitive load, make it easier for learners to rewatch specific steps, and are faster to update when tools or processes change. Longer workflows are best split into a short sequence of videos rather than one long recording.
When should I use screen recordings for training?
Screen recordings work best for procedural, software-based tasks—for example, using internal tools, running reports, completing workflows, or following standardized processes. They are less effective for judgment-heavy skills, leadership behaviors, or complex decision-making, which benefit more from scenarios, coaching, or practice-based learning.
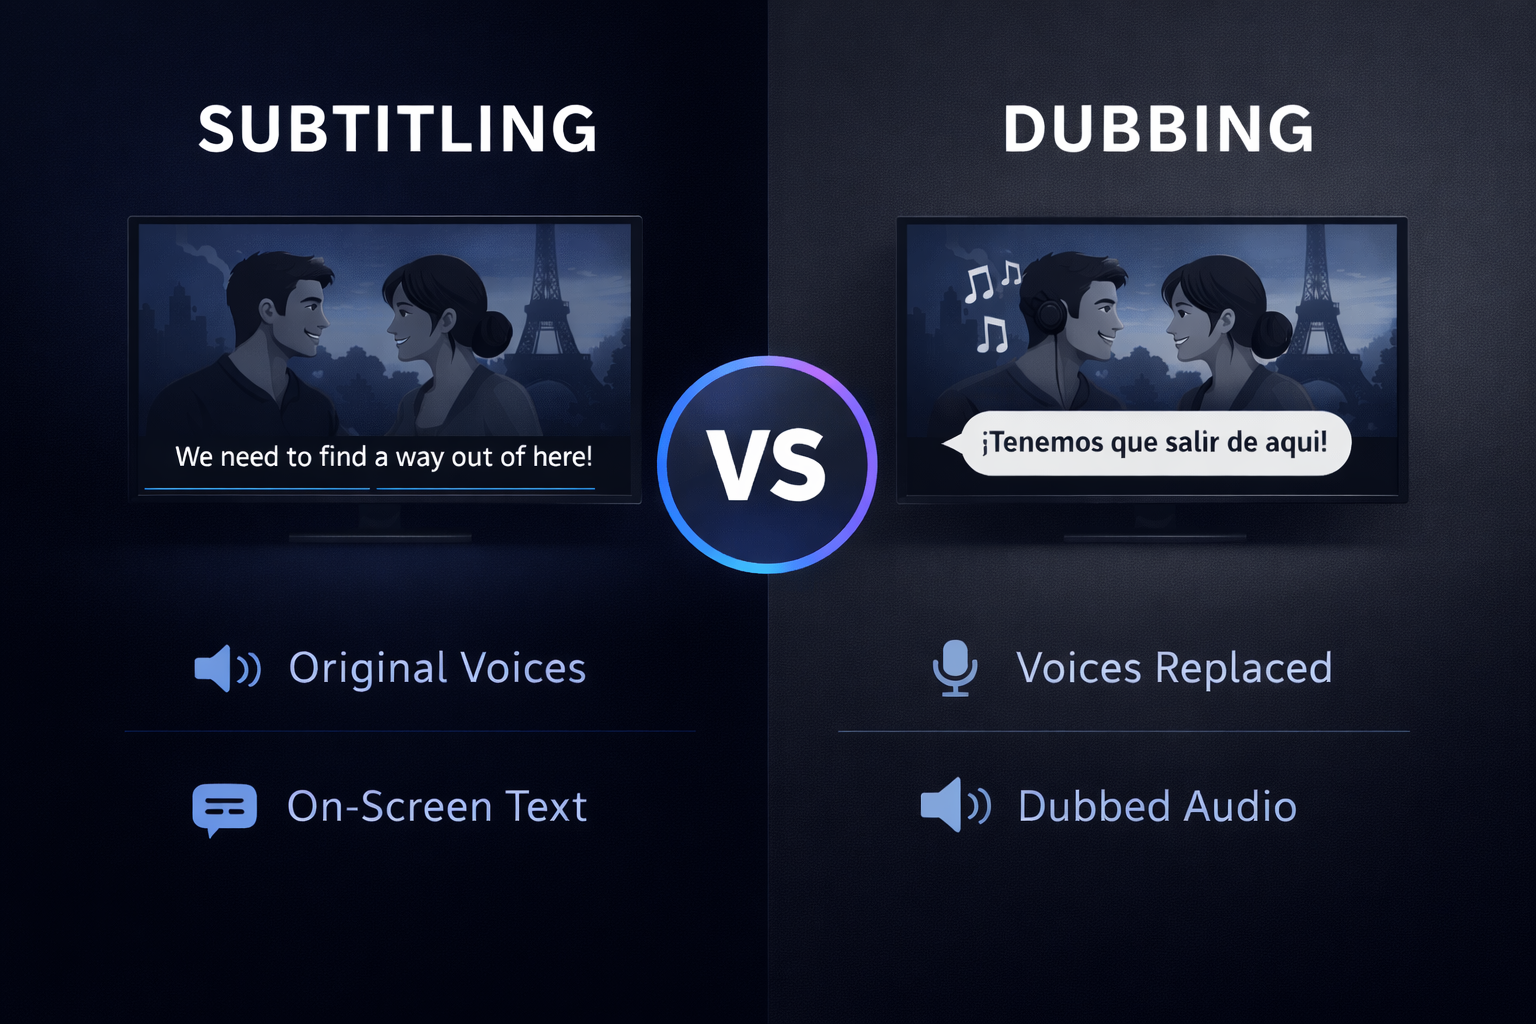
Should I use captions, subbing, or dubbing for instructional videos?
That depends on your audience and scale.
Captions / subbing are ideal for accessibility, quick localization, and accuracy.
Dubbing works better when you need voice-native delivery across regions or want learners to listen rather than read.
AI text-to-speech is effective for fast iteration and large libraries, especially when combined with clear scripting.
For global teams, this decision directly affects comprehension, adoption, and maintenance cost.
How do I know if my instructional video is actually working?
Go beyond views. Effective measures include:
Task completion rate after watching
Time-to-complete compared to baseline
Reduction in support tickets or repeated questions
Learner confidence or self-reported readiness
Instructional videos are successful when they change behavior, not just when they’re watched.
Can instructional screen recordings scale across large organizations?
Yes, if they’re designed correctly. Short, modular scenes with consistent scripting, narration, and visuals are easier to update, localize, and reuse across teams. This reduces message drift, removes dependency on individual experts, and supports consistent training and enablement at scale.