

Create engaging video tutorials in 160+ languages.
The last time I hired a video crew to film content for onboarding tutorials, it cost $10,000 for a single day of shooting.
That didn’t include editing, updates when the product changed, or localization for our global teams.
The problem wasn’t the video quality. It was that the moment we hit “publish,” the content started aging. So, let’s walk through how to make tutorial videos easy to update and localize.
What is a tutorial video?
A tutorial video is a short, task-focused instructional video designed to help someone perform a specific action correctly and confidently. Research consistently shows tutorials are most effective when they focus on one clear
outcome, stay concise, and are designed to support understanding and recall over time.
How do you design for change?
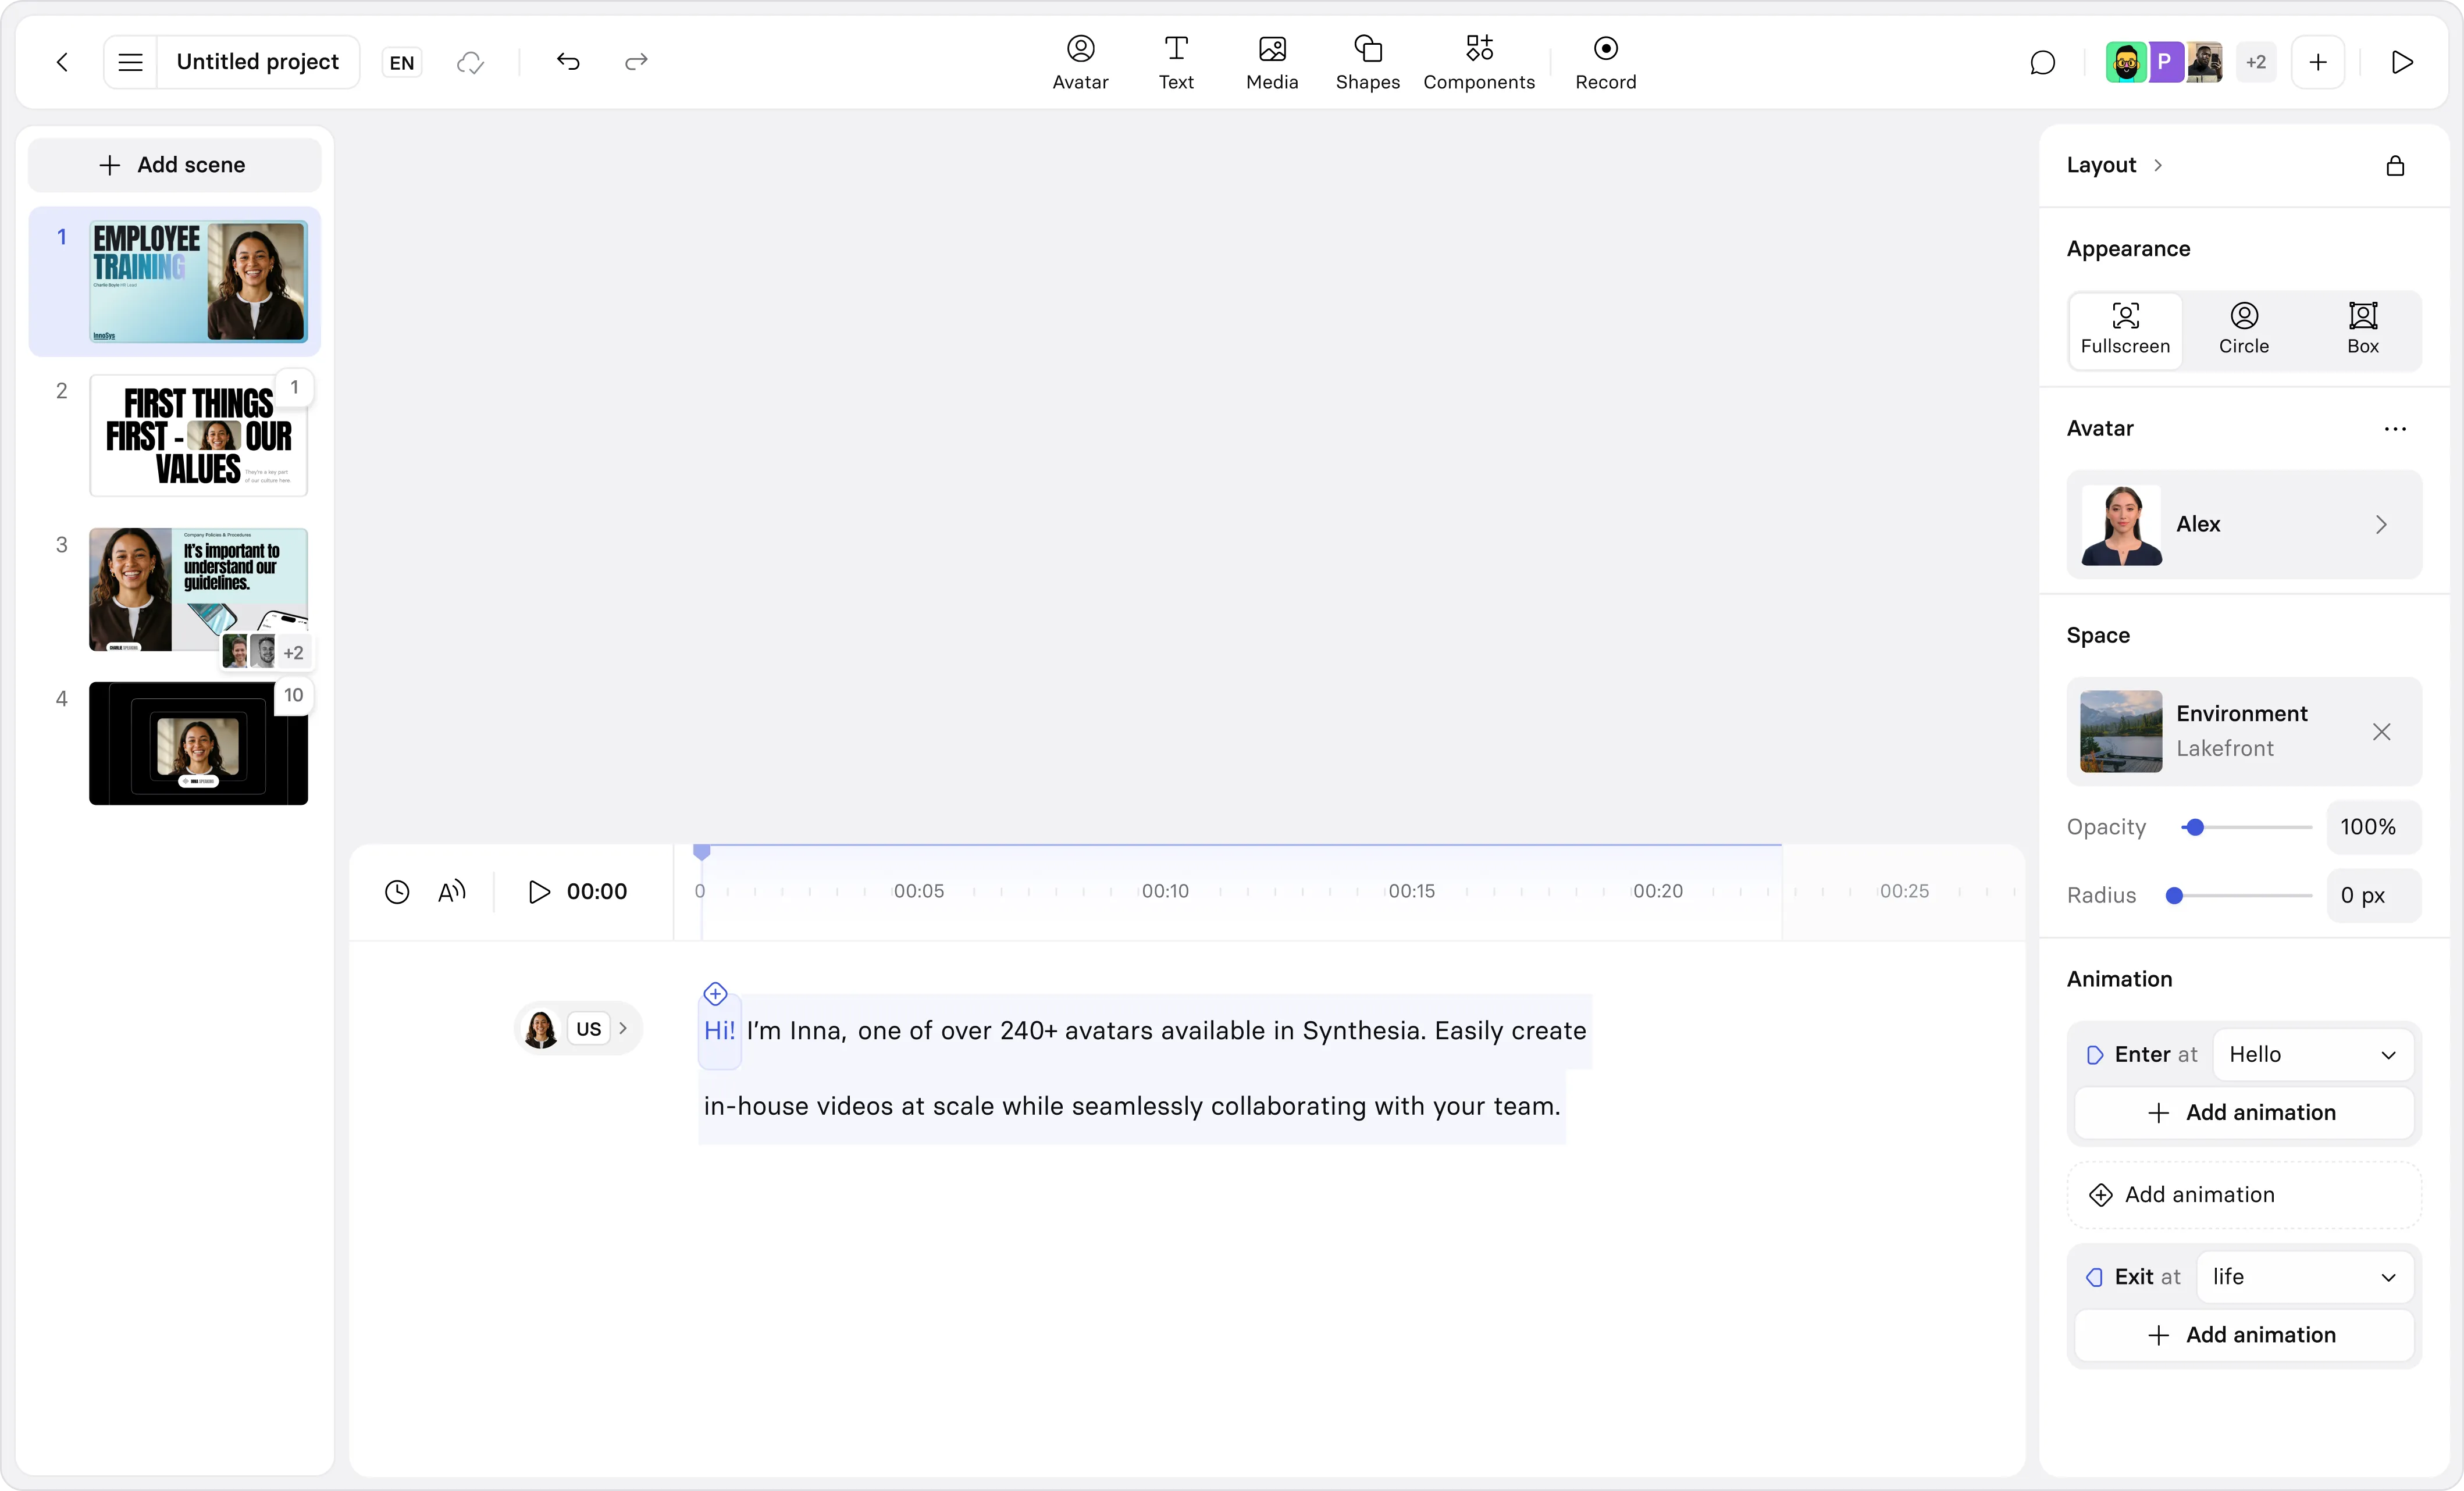
Before you choose a tool or hit record, it’s worth starting with a structure designed for video.
A good tutorial template embeds learning design principles into the layout itself — guiding how information is sequenced, how text and graphics are placed, and how attention is managed on screen.
This template gives you that structure so you can focus on the content, not the mechanics. Click “Edit” to explore how it works.
How do you create tutorial videos?
1. Define the tutorial’s job-to-be-done
Complete this sentence before anything else:
After watching this tutorial, the viewer will be able to [specific action] confidently.
If you can’t complete that sentence clearly, the tutorial will sprawl. And sprawl is what forces reshoots.
💡Tip: One tutorial video = one outcome. If there’s more than one, split it.
2. Anchor the audience and context
Be explicit about who this tutorial is for and when they’ll watch it.
- Who is the viewer? (role, experience level)
- When will they watch this? (onboarding, in the flow of work, refresher)
- What do they already know?
💡Tip: Assume viewers arrive mid-task, not in “learning mode.” Tutorials are performance support, not lectures.
3. Separate what stays stable from what will change
Get this step right and updates stay small; skip it and you’ll end up re-recording.
4. Outline the scenes (2–4 minutes total)
Structure the tutorial as a short sequence of scenes.
- Context (15–20 seconds)
Why this task matters right now. - Demonstration (60–120 seconds)
One clear path. No detours. - Checkpoint (30–45 seconds)
What “done correctly” looks like. - Next step (10–15 seconds)
Where to go if they need more detail or support.
💡Tip: If a scene doesn’t move the viewer closer to the job-to-be-done, remove it.
5. Plan for updates and localization
Treat updates as inevitable. Before publishing, note:
- What text will need translation?
- Which visuals can be reused across regions?
- What should be reviewed monthly vs quarterly?
💡Tip: If updates aren’t planned, these tutorials may quickly become irrelevant.
6. Review, publish, and measure what matters
Creating the video is not the finish line. For tutorial videos, the real risk starts after publishing—when content goes out of date, usage drops, or teams lose visibility into whether it’s actually helping people perform.
Before you publish, review your tutorial with three questions in mind:
- Is it still aligned to the job-to-be-done?
The video should make one action easier to perform. Anything that doesn’t serve that outcome should be removed. - Is it easy to update?
Scripts, visuals, and scenes should be modular so small changes don’t require starting over. - Can you measure whether it’s being used and understood?
Visibility builds trust. Black-box content doesn’t.
What are best practices for publishing tutorial videos?
Where and how you publish affects both adoption and measurement.
- Embed tutorials where work happens
Tutorials perform best when embedded in onboarding flows, knowledge bases, or tools employees already use—not hidden in course catalogs. - Use SCORM or LMS integration when measurement matters
If you need to track completion, progress, or checkpoint results, publish tutorials as SCORM packages or connect them to your LMS. This enables consistent reporting across regions and teams. - Measure signals, not just views
Completion rate, replay behavior, and checkpoint responses are more meaningful than raw view counts. These signals tell you whether the tutorial is supporting performance, not just being clicked. - Plan ownership and review cycles
Assign an owner and define review intervals (for example, quarterly for stable processes, monthly for fast-changing tools). Tutorials without ownership decay quickly.
💡Tip: Build tutorials like a library: clear ownership, regular reviews, and quick updates.
Next steps
Most teams don’t start from a blank page. They start with a documented process — slides used in onboarding, a PDF in a knowledge base, or steps written down in a doc. That material already reflects how work gets done. The job is to convert it into a clear, scene-based video.
If you have documentation, start there: copy the steps into a simple outline, then map them into short scenes (context → demo → checkpoint → next step).
If the process isn’t documented yet, start with a script. Write the outcome first, then draft a short narration that matches your scenes. Keep it modular so updates don’t require starting over.
Wherever you start, you’re building the same thing: tutorials that stay current and scale as your work changes.

Kevin Alster is a Strategic Advisor at Synthesia, helping enterprises apply generative AI to learning, communication, and performance. With over a decade in education and media, he’s built programs for General Assembly, NYT School, and Sotheby’s.


Frequently asked questions
What makes a tutorial video effective for training and onboarding?
Effective tutorial videos focus on one task or outcome, stay short (typically 2–4 minutes), and are easy to update as processes change. In training and onboarding, clarity and accuracy matter more than production polish, especially at scale.
How do you keep tutorial videos up to date as products or processes change?
Traditional tutorials require re-recording whenever something changes. AI-based video workflows allow teams to update the script, regenerate scenes, and republish videos in minutes without scheduling new shoots or editing timelines.
Can tutorial videos be localized for global teams without re-recording?
Yes. AI video platforms allow teams to translate scripts, narration, and on-screen text into multiple languages while keeping visuals and structure consistent. This makes global rollout faster and more reliable than managing separate recordings per region.
What’s the difference between screen recordings and AI-generated tutorial videos?
Screen recordings capture a moment in time. AI-generated tutorials are scene-based and modular, making them easier to revise, reuse, and adapt. For teams maintaining large tutorial libraries, this difference determines whether content stays current or quietly breaks.
How long should a tutorial video be?
Most high-performing tutorials are between 2 and 4 minutes. Shorter videos are easier to complete, easier to update, and easier to reuse as part of a larger learning or enablement system.