

How to Make Engaging, Professional Videos

Create AI videos with 240+ avatars in 160+ languages
Creating high-quality videos has never been easier. The tools are accessible, the tech is smarter, and you can produce polished content without a studio.
But creating engaging videos feels harder than ever.
Attention is scarce, skip rates are rising, and everyone is fighting for the same eyeballs.
But here's what I've learned after helping create thousands of videos at Synthesia: engagement isn't about expensive equipment or flashy effects. It's about quickly signaling value and making people feel understood.
When your audience truly engages, you'll see more than views and clicks—you'll see participation. Longer watch times. Detailed comments. Shares across platforms.
In this post, I’ll show you how to create high-quality, engaging video content.
10 tips on how to create high-quality, engaging videos
It doesn't matter whether you're a marketer looking to boost your content marketing strategy with an explainer video or a content creator looking to up your social media game; these tips are universal.
1. Plan your video
I think the planning phase matters more than production quality.
I've found that pre-production decisions—understanding your audience, scripting for spoken clarity, choosing the right format—have the largest impact on engagement, more than expensive equipment or post-production polish.
I always start by mapping the exact goal and audience persona before writing a single line of script.
This ensures your message is focused and truly relevant. When you nail the planning phase, everything else falls into place naturally.
I recommend following the FOCA video framework when planning your video.
2. Create content relevant to your audience
Understanding your target audience is a fundamental aspect of making engaging videos.
To truly engage your audience, it's crucial to delve deep into their habits, struggles, and preferences.
Metrics play a vital role in this process, as they provide essential data that helps you tailor your content specifically to your target audience.
The more you know about them, the better equipped you are to create videos that resonate with their needs and interests.
Your video script should be so finely tuned to your audience's mindset that it feels like you're reading their thoughts.
When viewers encounter a video that speaks directly to their internal dialogues, it creates a powerful connection and a sense of relevance.
I always try to use voice of customer research as an input when writing my video scripts.
I'll typically collect this research by running customer surveys, reading reviews, or even just chatting direct with people in my audience.
If you're struggling to translate customer insights into scripts, tools like Synthesia's AI Video Assistant can help you draft spoken-first scripts based on your brief, saving hours of iteration. The key is starting with clear audience insights—the AI helps translate those into engaging narrative.
From my perspective, starting every video project with a clear purpose and a defined audience persona is key.
I always recommend mapping out the exact goal of your video before writing a single line of script. This ensures your message is focused and truly relevant.
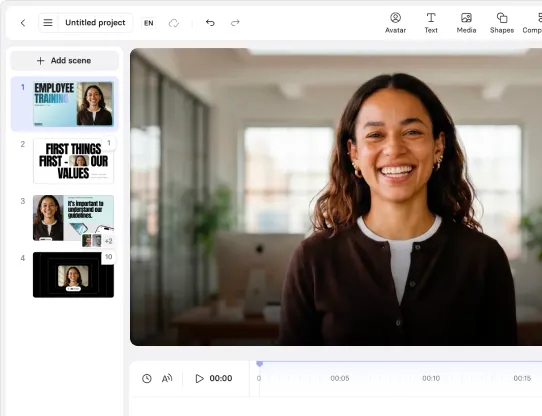
3. Use templates
Templates are the fastest way to make your video look intentional and professional without getting stuck in design or editing.
A good template handles pacing, layout, typography, animations, and scene structure for you, so you can focus entirely on the message.
When I build videos at Synthesia, I almost always start with a template. It instantly solves the “blank page problem,” keeps the visual style consistent, and speeds up production because every scene has a purpose.
Templates are especially powerful if you’re not a designer. Instead of guessing where text should go or how long a scene should last, the design choices are already made. You simply drop in your script, choose an AI avatar, add supporting visuals, and you’re ready to preview.
If you need variation, you can switch between template layouts to keep viewers engaged.
A talking-head scene for the main explanation, a split screen to show examples, a screen recording for a quick demo, or a text-first layout to emphasize key points.
That scene diversity keeps attention high without needing advanced editing skills.
The best part is that anyone on the team can reuse the same template, which helps your videos feel consistent across topics, departments, and languages.
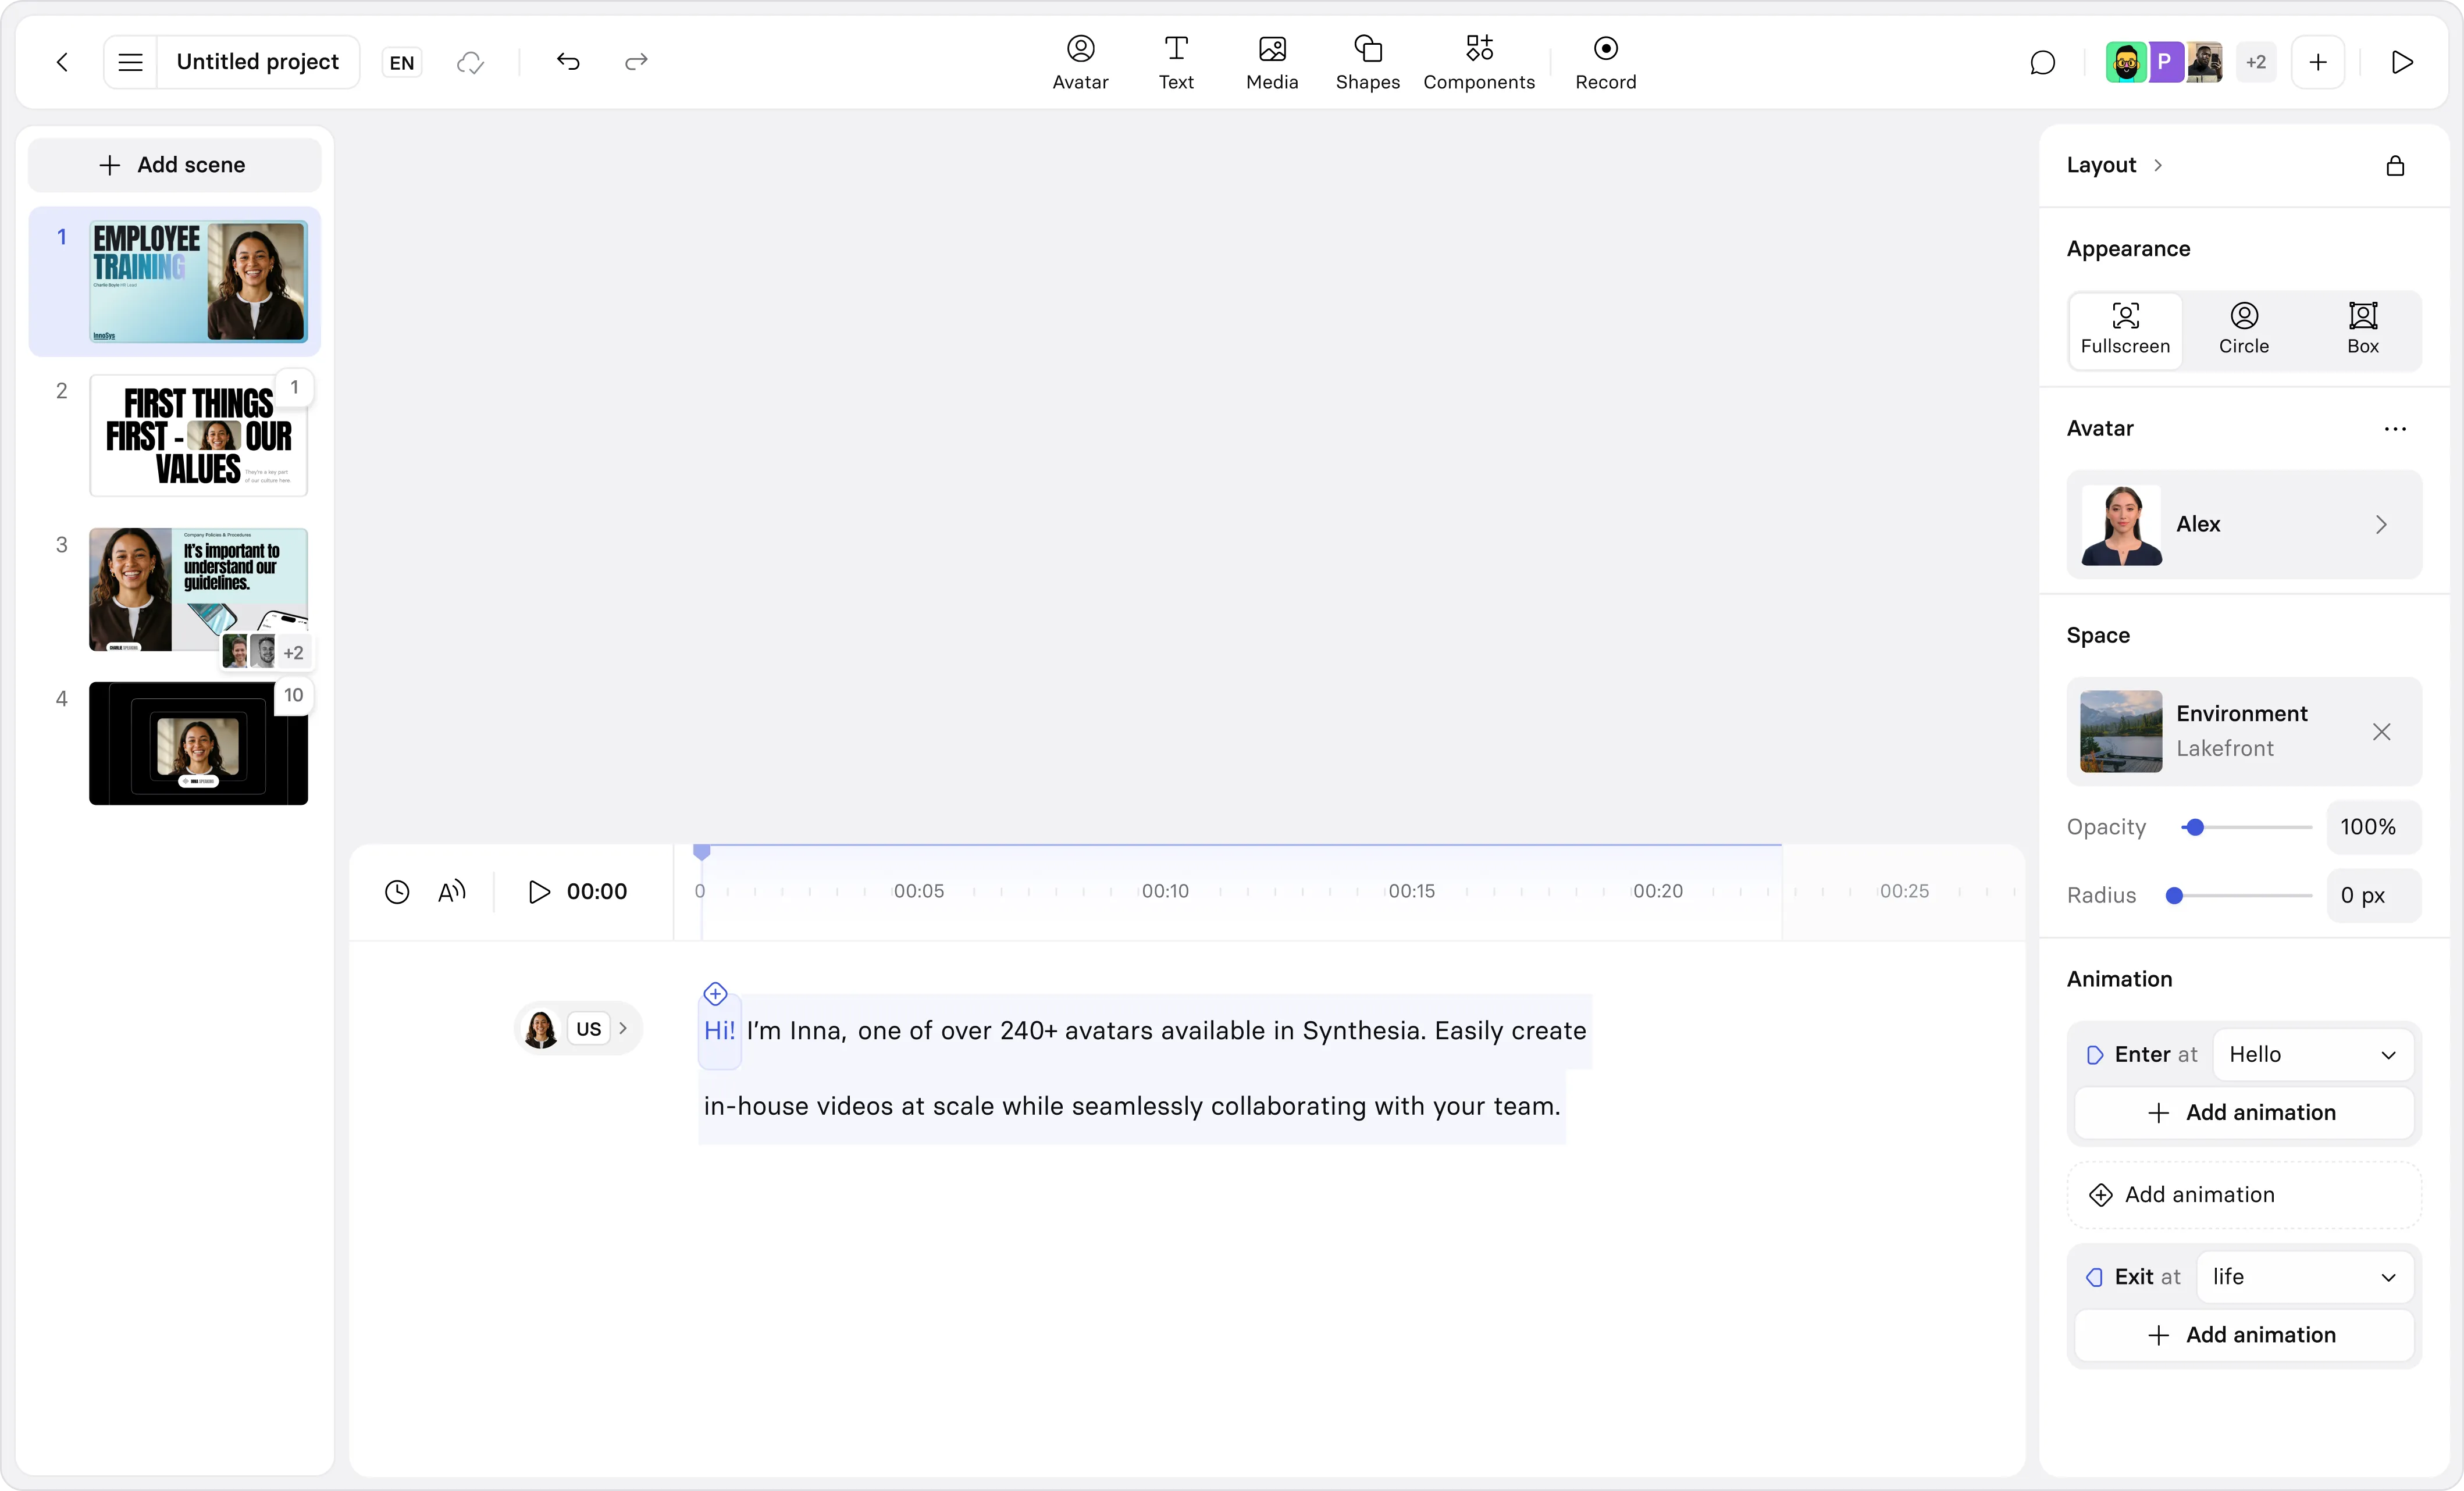
4. Use striking imagery and visuals
We are all naturally drawn to great visuals.
The human brain processes images 60,000 times faster than text, so the visual layer of a video has a huge impact on how people feel and what they remember.
The best part is that you no longer need cameras or a production crew to create something striking. You can use a free AI video maker like Synthesia to build full videos with AI presenters, voiceovers and B-roll.
What makes a visual “striking” is not how cinematic it looks, but how well it supports the idea you are trying to explain.
Scenic drone footage and high-end photography can look impressive, but they only work if they reinforce the message.
When visuals feel random or decorative, viewers disconnect.
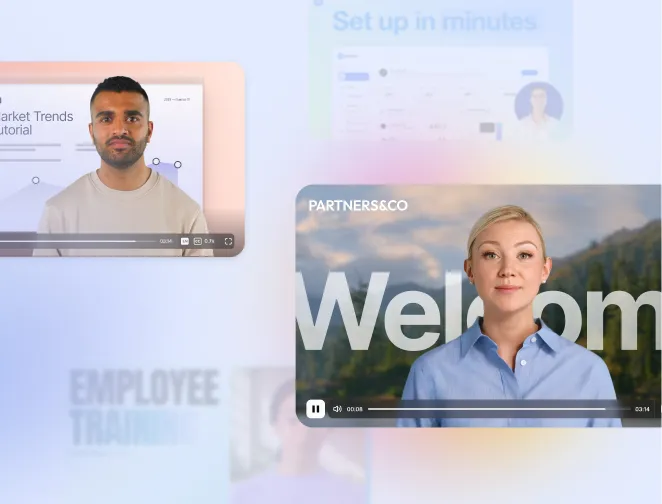
There is a counterintuitive insight here. Informal talking-head videos often perform better than polished studio productions.
I've found that consumers prefer authentic and relatable content over traditional corporate videos. At Synthesia, we see it all the time.
Customers who use conversational AI avatars in simple environments often see higher completion rates than those who rely only on complex animation.
Talking-head style content works because it creates a human connection. It also makes it easier to break up the experience with supporting visuals.
B-roll, screen recordings, diagrams, and animation give variety and help explain concepts that are difficult to describe with words alone.
A good structure blends them all together.
Let the avatar speak directly to the viewer, then cut to motion graphics, short clips, dynamic transitions, or kinetic text when you want to emphasize a point.
Color, contrast, and subtle motion can all help guide attention and create emotion without overwhelming the message.
I have found that switching between an AI avatar, B-roll, simple animations, and screen recordings keeps attention high from start to finish.
This is why Synthesia templates are designed with scene variety in mind. You get a visually dynamic video without needing editing skills or a full production setup.
5. Audio quality matters more than visuals
Audio quality matters more than visual quality—bad sound will kill engagement faster than shaky footage.
Record in a quiet space with soft furnishings to reduce echo. Position your mic 6-8 inches from your mouth.
For AI-generated content, preview pronunciation carefully, especially for technical terms or non-English content.
We've found that clean audio with subtle background music at -20 LUFS adds energy without distraction.
6. Tell a story with your video
Storytelling is an integral part of human nature, deeply ingrained in our history and psychology.
The earliest recorded story dates back about 30,000 years, found on the walls of the Chauvet cave in France, illustrating the timeless nature of storytelling.
This innate attraction to stories is not just a historical fact; it's rooted in our brain's wiring. Hearing a story can increase neural activity fivefold, as MRI scans reveal how different words stimulate various brain regions.
In the context of a marketing strategy, especially video marketing, leveraging the power of storytelling can significantly enhance engagement.
An engaging story in a marketing video resonates more powerfully with the audience than mere facts or instructions.
For example, instead of using a monotone voiceover to guide viewers through a product's functions, incorporating these steps into a story format makes the content more captivating and memorable.
In my experience, the best training videos I've created always wrapped technical information inside a relatable scenario.
To boost audience engagement, consider adopting story-based frameworks.
Positioning the viewer as the "hero" of the story or using the "hero's journey" narrative structure can be particularly effective.
This approach makes the content more engaging and ensures that the message resonates deeply and endures in the viewer's memory, much like a catchy Disney musical soundtrack.
7. Evoke emotion
When viewers are emotionally connected with the video, they become invested in it and seek a resolution or a satisfying conclusion.
Using emotive words in your video script is one way to create more engaging video content. But you could also consider other emotional reactions your audience will have towards the sound, color palette, actors, environment, and overall style of your video.
Different actors can elicit different states of mind:
- The CEO can narrate a brand story in an explainer video and inspire confidence.
- An employee can share a work-related experience and inspire trust.
- A customer can show up in a video testimonial and encourage authenticity.
You can create your own custom avatars in Synthesia with a webcam or your cell phone camera.
You can use basic emotions like humor, sadness, excitement, fear, anger, happiness, or even playfulness to get viewers on your side.
However, you can use a few deeper emotional beliefs to lead your audience to a "that's right" feeling.
I've found that videos tapping into the "there must be a better way" emotion consistently drive the highest engagement rates, especially for how-to and tutorial content.
I like to use tone of voice, color, chill music and visual elements to work together to create memorable emotional connections through your video content.
8. Hook your audience from the start
Capturing a viewer's attention in the initial moments of a video is crucial for engagement.
A study by Microsoft found that the average human attention span has significantly reduced, now standing at just eight seconds.
This dramatic shift highlights the urgency for content creators to produce video content that grabs their audience's attention almost immediately.
Videos that fail to engage viewers within these critical first few seconds will likely experience high drop-off rates. You've got about 3-5 seconds to prove value.
In my experience creating thousands of videos at Synthesia, the most effective hooks follow this pattern: outcome first (what they'll learn), proof second (why it matters), then dive into content. Skip logos and intros—those come after you've earned attention.
Interestingly, there isn't a one-size-fits-all rule regarding the optimal length of a video.
Research analyzing millions of video sessions found that shorter videos dramatically outperform longer ones in completion rates.
The key isn't arbitrary length—it's whether every 10 seconds delivers value. If a segment doesn't move the story forward, cut it.
On platforms like YouTube, which boasts 2.2 billion monthly users, the ideal video length is generally around 10 minutes.
However, viewer engagement significantly drops for videos that exceed 60 minutes, with only 16% of viewers watching such videos to the end.
Conversely, videos shorter than 60 minutes retain 62% of viewers.
For videos over 3 minutes, use clear chapter markers so viewers can navigate to relevant sections.
This is especially important for tutorial content where people often return to specific steps.
If you've got an audience constantly on the go, break down longer videos into micro-videos for each topic or task.
You'll force yourself to get to the point fast and create engaging videos perfect for social media platforms.
I recommend scripting your hook before anything else, whether it's a surprising statistic, a direct question, or a bold statement. This sets the tone and ensures you capture attention immediately.
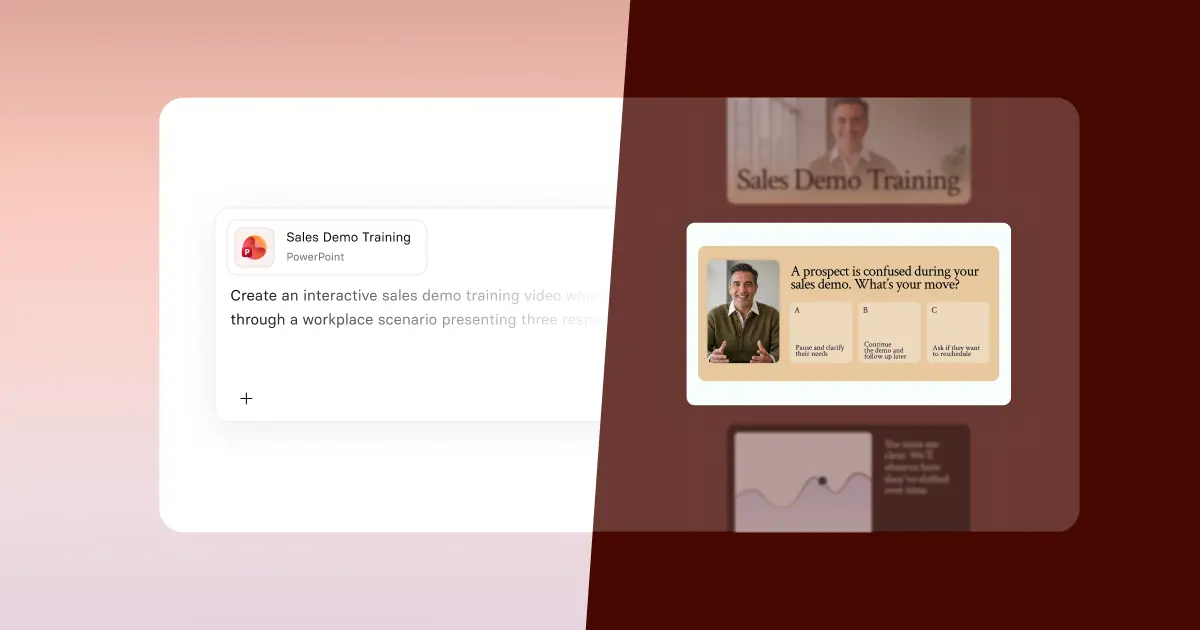
9. Add meaningful interactions
Branching scenarios, clickable buttons, links, quizzes, checklists, and anything that requires viewers' active participation will help them feel more immersed and committed to completing your video and putting it to use.
To take it a step further, you could gamify the experience by creating scenario-based videos to let viewers shape how the video evolves through what they click on.
Our customer data shows organizations using branching scenarios see 68% decrease in video abandonment and 25% increase in knowledge retention.
One manufacturing company reduced training time by 40% after adding embedded quizzes that let learners test comprehension in real-time.
The key is making interactions meaningful—not just clickable, but genuinely useful for reinforcing learning or exploring different paths.
10. Be genuine
A genuine personality helps foster a sense of trustworthiness with your audience.
Personality helps people decide if they resonate with you enough to trust what you're saying and take action on it.
78% of consumers say it's more important to them that authentic and relatable video marketing attracts them more than just polished and high-quality videos.
Different personalities attract different types of audiences. Just think about Gordon Ramsay and Jamie Oliver, two distinct chefs, each one with a distinct large audience.
The point? It's not as much about what you stand for as it is about attracting the audience who shares your stand.
When someone chooses your video, they begin doing the marketing for you.
They engage with your content and share your videos with others, increasing your reach and endorsing your work with a "Hey, this is awesome!" shoutout.
In my years of creating video content, I've learned that perfection often gets in the way of connection.
Some of our most successful videos at Synthesia have been the ones where we showed our process, shared our mistakes, and let our genuine enthusiasm for helping people create better videos shine through.
If you're creating videos with yourself as the presenter, tell personal stories, experiences, or behind-the-scenes insights. While filming, avoid an overly scripted or rehearsed delivery to let your natural personality shine through.
Engage with your audience by responding to comments, addressing feedback, or incorporating user-generated content. Show up for everyone as much as possible.
Start making great video content today
Time to make the most of these tips by putting them into practice.
You still need to plan your next successful video. But with the tips above and the insights in our following post on the FOCA video creation framework, you'll create engaging video content that is replay-worthy in no time.
End every video with one specific, achievable action that matches the value you just delivered. Not "like and subscribe"—that's about you, not them.
Instead: "Download this checklist and apply step one today" or "Try this technique on your next project and tell me your result."
Single, clear CTAs that extend the value you just provided will drive more meaningful engagement than generic requests.
Kyle Odefey is a London-based filmmaker and Video Producer at Synthesia. His content has reached millions across TikTok, LinkedIn, and YouTube, even inspiring an SNL sketch, and has been featured by CNBC, BBC, Forbes, and MIT Technology Review.
Frequently asked questions
What makes a video engaging?
Engaging videos captivate their audience and keep them interested throughout its duration. Several key elements contribute to making a video engaging:
- Strong storytelling: A compelling narrative or story is crucial. It should have a clear beginning, middle, and end, and ideally, it should evoke emotions or provoke thought.
- High-quality visuals: Good quality visuals are important for holding viewers' attention. This includes clear, high-resolution images, appealing color schemes, and thoughtful composition.
- Relatable content: Content that resonates with the audience's interests, problems, or experiences can significantly increase engagement. Understanding the target audience is essential in creating relatable content.
- Good pacing: The rhythm of the video should match its content. Fast-paced for excitement and slower for more dramatic or informative parts. Proper pacing keeps the viewer engaged without feeling overwhelmed or bored.
- Clear and concise messaging: The message should be clear and conveyed efficiently. Overly complex or ambiguous messages can lose viewers' interest.
- Interactive elements: In some formats, like online videos, interactive elements such as clickable links, polls, or questions can increase engagement.
- High-quality audio: Clear and high-quality sound, whether it's dialogue, music, or sound effects, significantly affects how viewers perceive the video.
- Professional editing: Good editing can enhance storytelling, maintain pacing, and improve the overall aesthetic of the video. It includes transitions, sound editing, and visual effects.
- Emotional connection: Videos that evoke emotions, whether happiness, sadness, excitement, or inspiration, tend to be more engaging.
- Uniqueness: Offering something new, whether it's an original idea, unique perspective, or innovative format, can make a video stand out and keep viewers interested.
- Call to action: Encouraging viewers to engage further with the content, whether by commenting, sharing, or exploring more, can increase engagement.
How do you make video content interesting?
To make video content interesting, experimenting with various video formats can be highly effective.
- Incorporating behind-the-scenes footage offers a unique and authentic glimpse into the creation process, humanizing your brand and fostering a deeper connection with your audience.
- Diversifying the video format, such as alternating between interviews, how-to guides, or animated explainers, keeps the content fresh and engaging.
- Leveraging live video formats can add an element of spontaneity and real-time interaction, inviting viewers to engage directly with the content creators.
How do you engage viewers in a video?
To engage viewers in a video, it's essential to strategically answer questions and spark curiosity throughout the content. Begin by addressing common questions or concerns your audience might have, providing valuable insights or solutions that resonate with their needs.
Simultaneously, sprinkle elements that spark curiosity, such as intriguing facts, thought-provoking questions, or teasers about what's to come later in the video. This combination of answering questions and igniting curiosity keeps the audience invested and eager to watch your video to the end, as they're constantly intrigued and finding value in the content.
How do I hook viewers quickly?
You’ve just seconds to grab attention. Open with something striking or urgent. Make your point fast and avoid overly long intros. Consider micro-videos for quick impact.
Are visuals and sound really that important for making engaging videos?
Absolutely. A well-crafted visual palette and crisp audio can elevate your video’s professionalism and emotional impact—our brains process images far faster than text.
What's the easiest way to turn my existing documents into videos?
Synthesia's AI Video Assistant can convert your PDFs, documents, and web links directly into engaging video content. This saves you from writing scripts from scratch and helps transform text-based materials into visual content that people actually want to watch.

.webp)

.webp)